The Bantam Tools FR-4 Milling System captures airborne dust while milling FR-4 and other materials, and can greatly reduce the chemical risks involved with milling these materials. This system offers a great way to use the Bantam Tools Desktop PCB Milling Machine to mill sturdier prototype PCBs with safer and more consistent methods. This tutorial shows you how to properly install and use the Bantam Tools FR-4 Milling System.
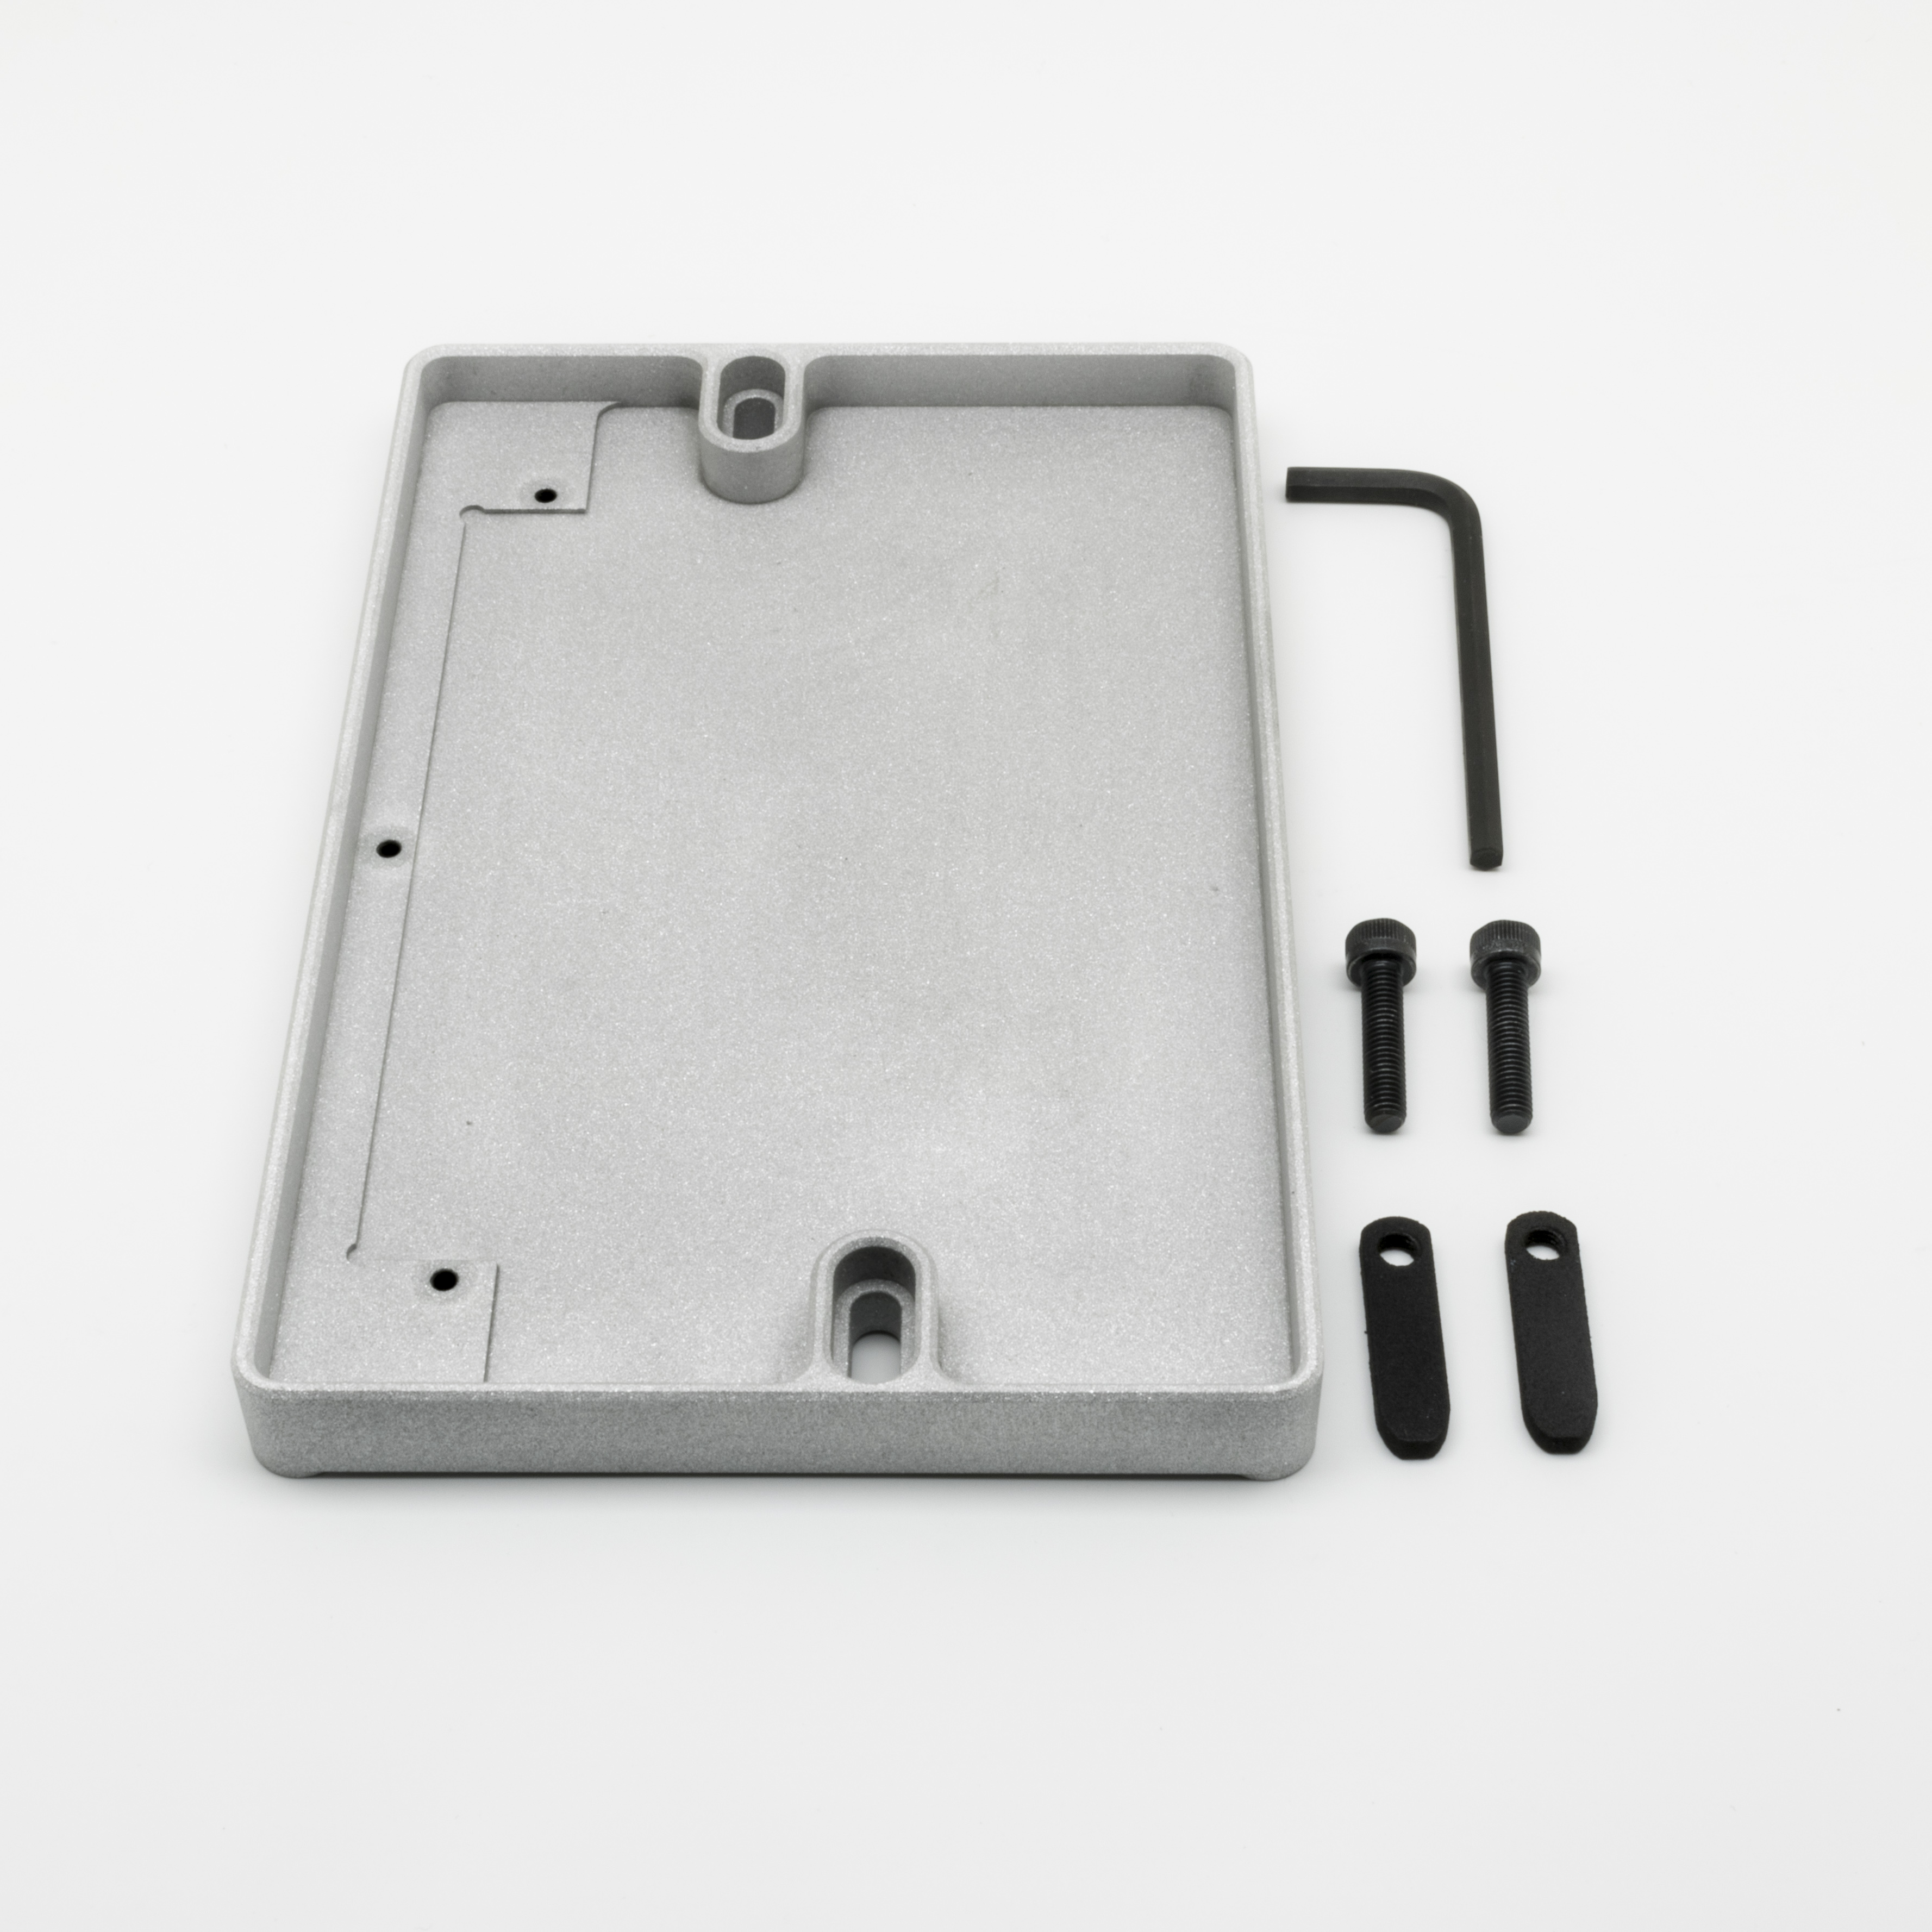
Included in the FR-4 Milling System:
- Mineral oil tub
- Handle nuts
- Long bolts
You'll also need:
Step 1: Set up your mineral oil tub.
To start, place your mineral oil tub face up on a clean surface. Slide the two bolts through the bolt slots in the FR-4 Milling System. Thread a handle nut on the end of each bolt and turn it until the tip of the bolt is just barely through the handle nut.
NOTE: You should only need to do this process during initial setup. For general use, you won't need to remove the handle nuts from the mineral oil tub.
Step 2: Place your FR-4 Milling System.
Clear your spoilboard by removing any materials and fixturing such as the Alignment Bracket. If you use the material thickness probing clip, remove it from the spoilboard and install it in any of the holes in the mineral oil tub.
With each bolt slid to the farthest edges of the mineral oil tub, place the assembly on your milling machine’s spoilboard.
Using the alignment features (the bottom left bolt hole and left edge of the spoilboard), place the FR-4 Milling System. The front of the FR-4 Milling System will be flush with the front of the Y-carriage, and it'll have an even amount of overhang on each side of the spoilboard.
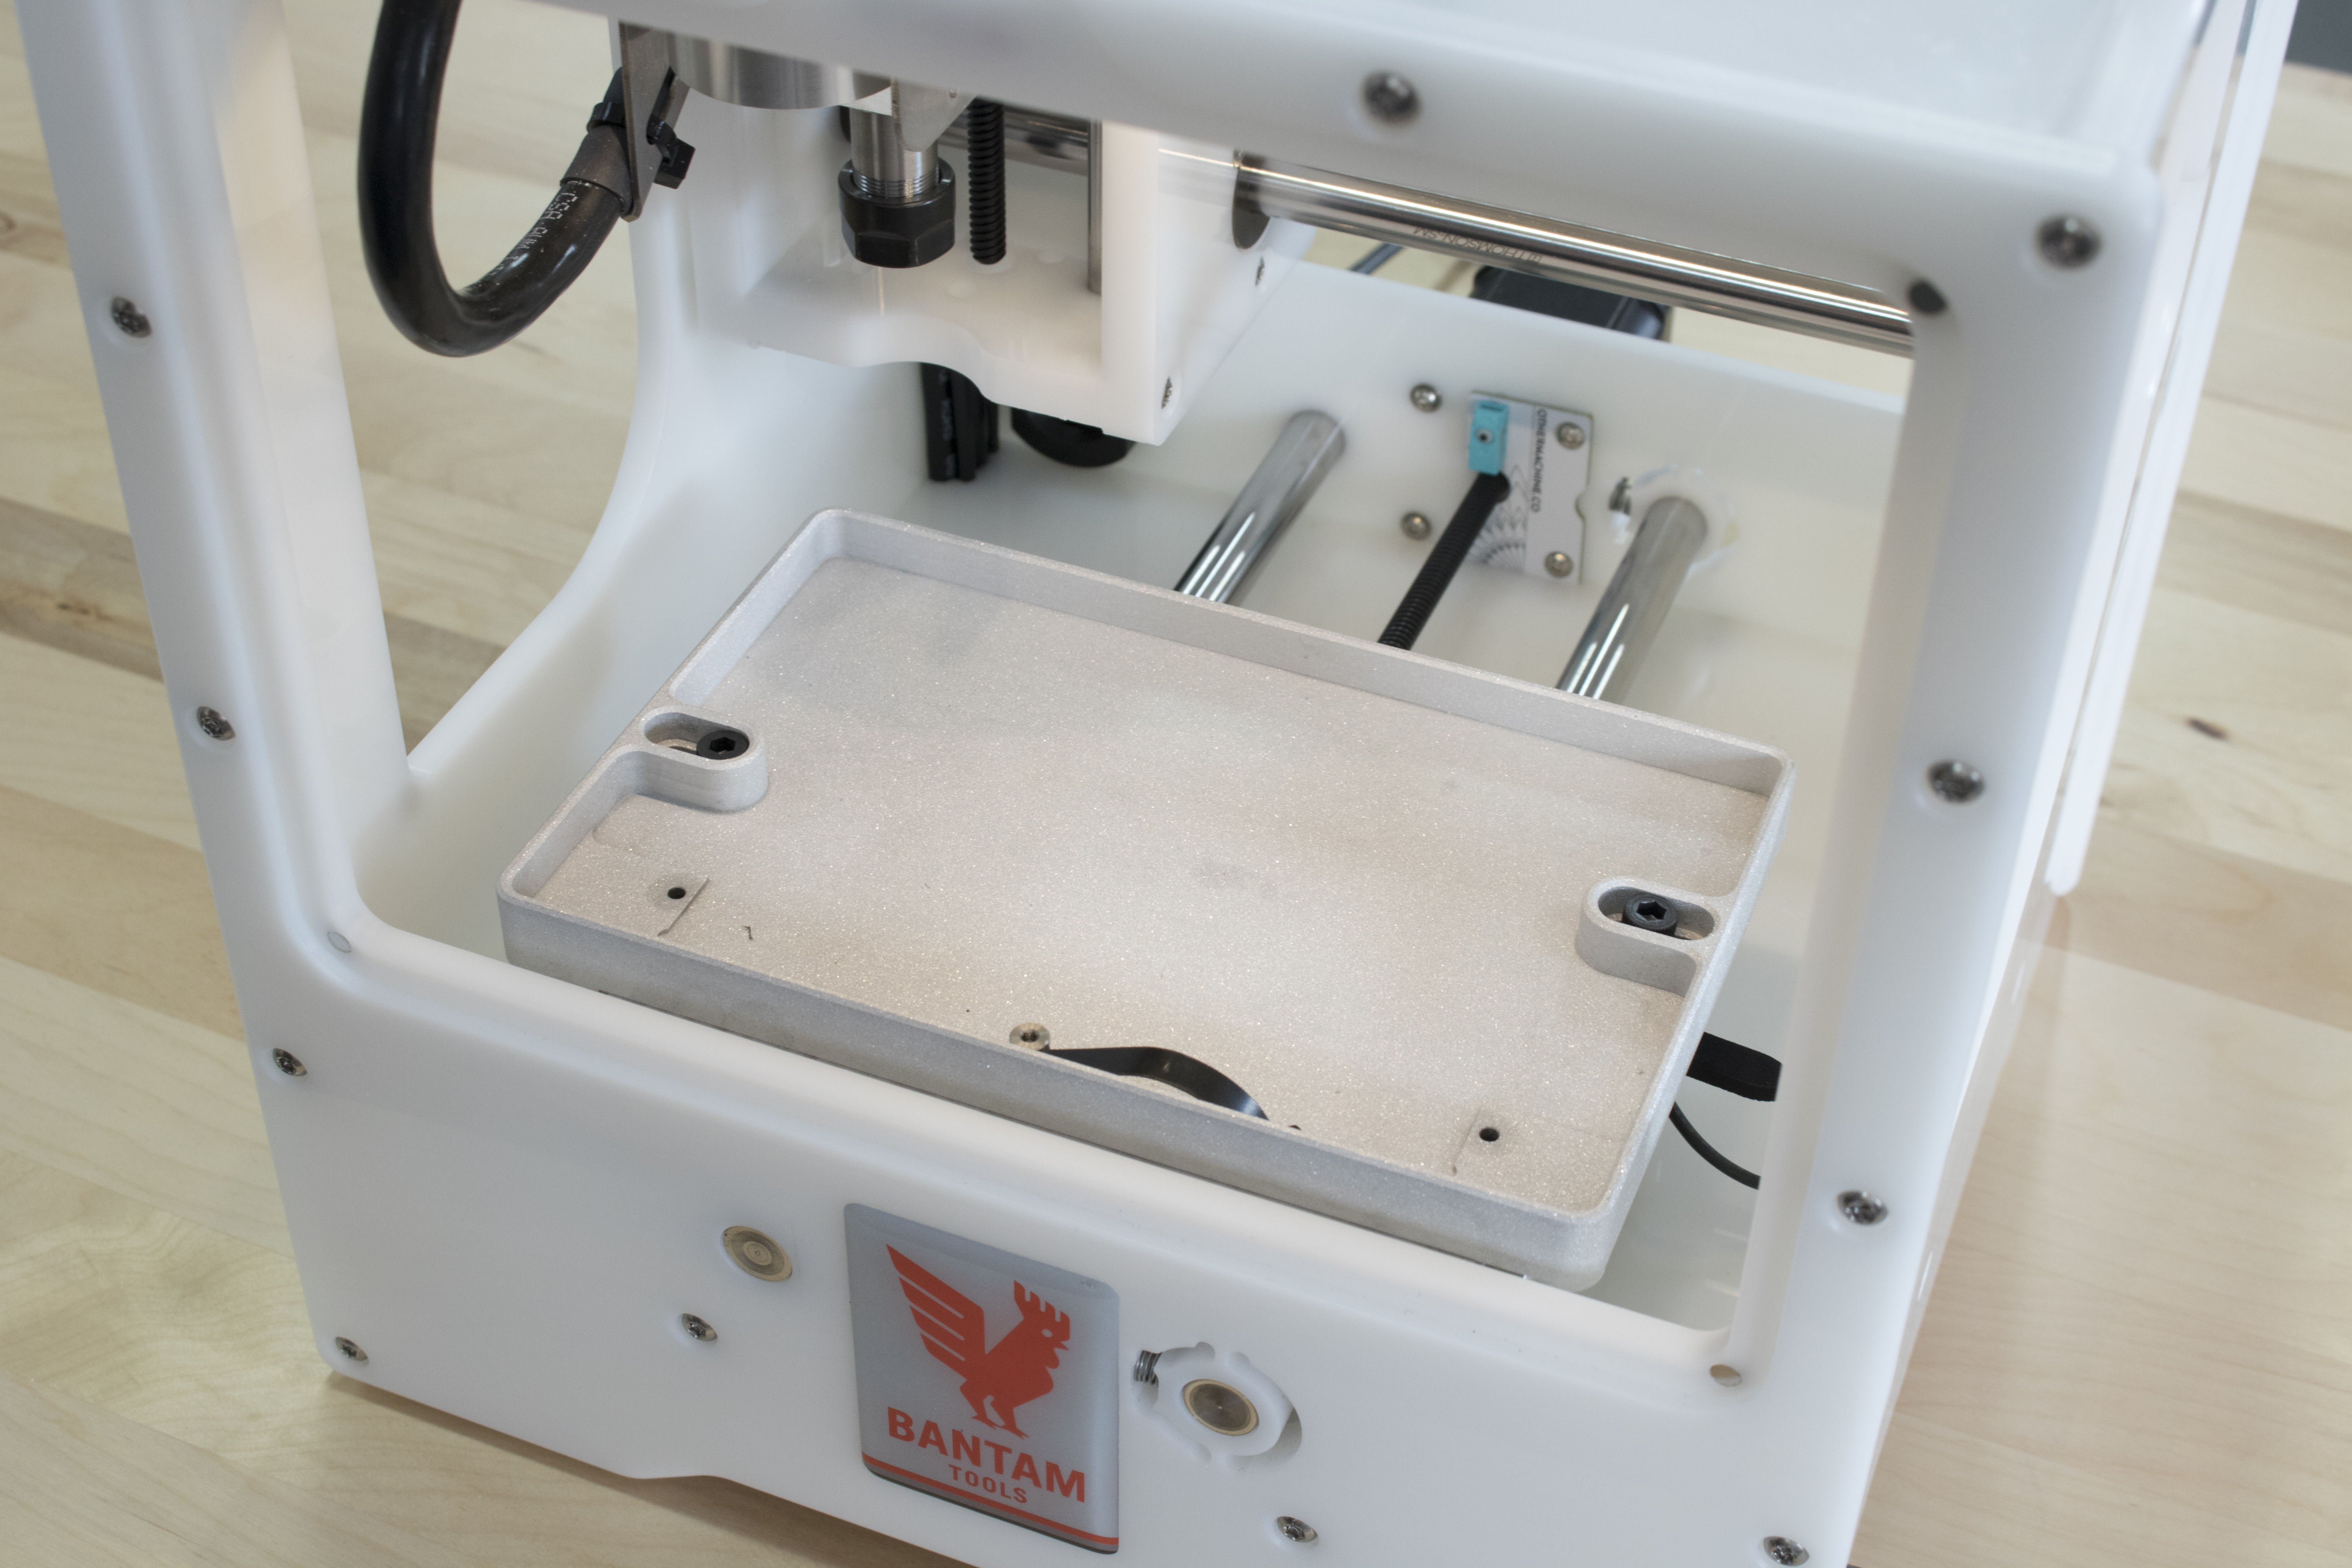
To hold the FR-4 Milling System in a stable location against the alignment features, apply diagonal pressure right and downwards.
While holding the FR-4 Milling System firmly yet carefully against the alignment features, slide each bolt inwards so the handle nut slides into the T-slot.
Tighten the Allen bolts after both are as far inwards as allows. The bolts should be snug but not overtight. For easier installation and removal, a quarter or half turn of each bolt should be enough.
IMPORTANT: Your first time doing this may take some adjustment, so we advise installing and removing the FR-4 Milling System at least once without mineral oil to set up the handle nut heights up properly.
Step 3: Set up your milling operation.
To set up your milling operation, run the bracket alignment setup in your Bantam Tools Desktop Milling Machine Software. The internal bracket in the mineral oil tub will act like your normal alignment bracket, and can be treated as such. Attach your FR-4 or other material to the Alignment Bracket within the FR-4 Milling System using double-sided tape. Make sure the surface is totally clean and oil-free before taping it down.
Now it’s time to fill the FR-4 Milling System with mineral oil. Fill the mineral oil tub about 1/3 to 1/2 of the way, which will be 1.5 – 2 fl. oz. of mineral oil. For bigger bits, taller material, or longer programs, fill with more mineral oil, as it will increase in opacity as you mill your FR-4 board.
WARNING: If you fill within about 1mm of the top surface, there is a risk of overflow from the FR-4 Milling System when the Y-carriage is in motion. Monitor your FR-4 Milling System closely at the beginning of every new job to prevent overflow.
Step 4: Clean up after milling.
To properly clean your FR-4 Milling System, you’ll need to remove it from your machine. First, loosen the bolts a quarter turn and slide to the fully exterior position.
Once the handle nuts are out of the way, you can carefully lift and remove the tub from your milling machine. There are recesses in the FR-4 Milling System that the handle nuts rest in, which allows you to set the entire tub flat on the surface of a table without spilling.
Dispose of the majority of the contaminated mineral oil in a trash can before removing your finished part. It's easiest to remove your part from the FR-4 Milling System in the typical fashion using a scraper, but do so slowly to avoid splashing mineral oil.
Wash your parts and FR-4 Milling System thoroughly with water and dish soap. Dry thoroughly, and you should be ready to mill another part using your FR-4 Milling System!
WARNING: If you don't correctly remove all the oil from your FR-4 Milling System, your next part may not successfully stick and can slide during milling. It's very important to get a clean surface after every milling job.
Notes on Functionality
- The Alignment Bracket is replicated in the oil tub. This means that when the FR-4 Milling System is properly installed (using the alignment features) you can locate the bracket using the same location procedure as the standard PCB Alignment Bracket.
- The alignment features and installation method described above allow the position of the oil tub to be fairly repeatable, so much so that you may not need to use the locate fixturing feature in the software every time it's removed. For extremely precise work, however, we recommend you locate the bracket every time before you start milling.
- You can operate your probing clip inside your FR-4 Milling System, and submerge it in mineral oil, if you wish to do so on material tool touch-off while using the FR-4 Milling System.
- Avoid spilling mineral oil within your milling machine, particularly on any of the ways or the spindle pulleys and drive belts. If you do spill, clean oil with a lint-free rag to the best of your ability.
- If you do spill some mineral oil, tilt your machine slightly forward so it pools near the front of the machine, then remove as much of it as you can.
- Clean and dry your FR-4 Milling System immediately after every use.
- Avoid milling FR-1 with the Bantam Tools FR-4 Milling System.