The PCB Probing System allows for quick and precise measurement of the thickness of PCB material that is already installed in the machine. When milling fine traces with small tools, getting the depth correct is critical. This system removes some of the variables that can affect the depth of the cut. This tutorial shows you how to use the PCB Probing System.
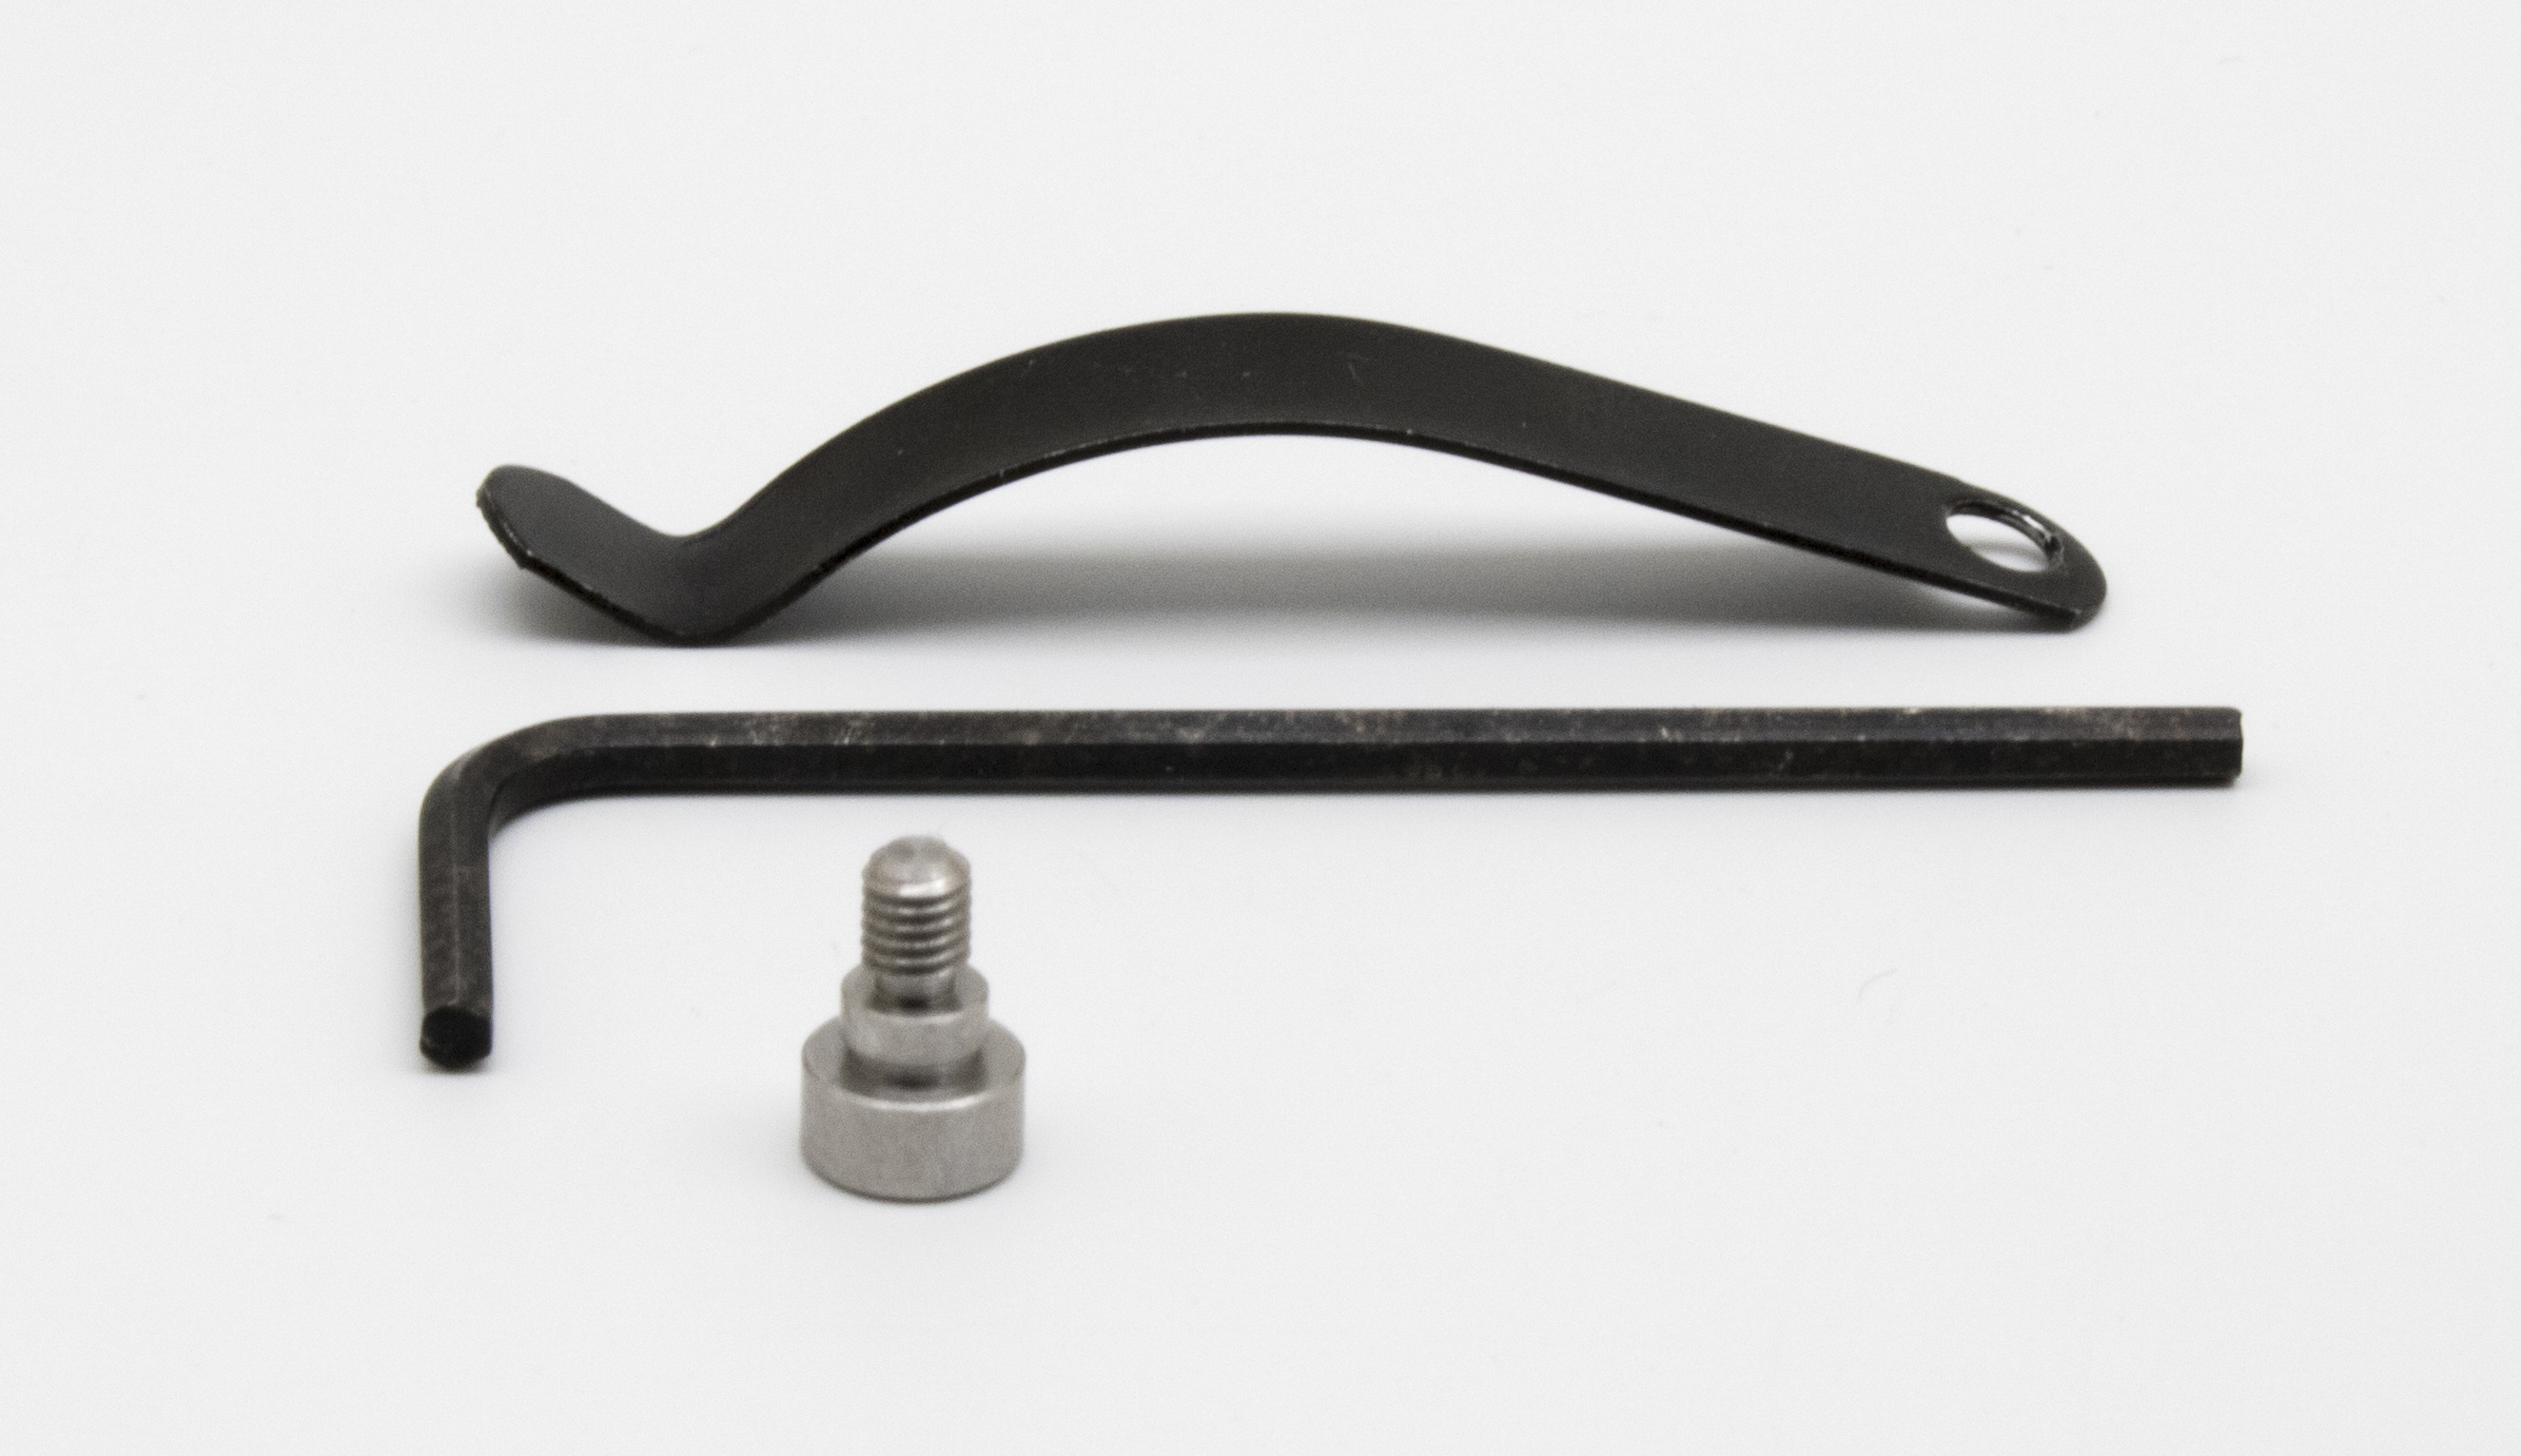
Included in the PCB Probing System:
- Probing clip
- Probing clip bolt
- Allen wrench (2mm)
Installation
The PCB Probing System can be installed in any of the three threaded holes at the front of the spoilboard that are used for attaching the alignment bracket and can be installed with or without the alignment bracket present. It can also be installed in the same three locations on the T-slot bed or in the FR-4 Milling System.
The probing clip is secured using the probing clip bolt. Unlike a normal bolt, it has a cylindrical shoulder between the threaded portion and the head. The hole in the clip should rest around the shoulder and float freely under the head. The clip shouldn't be clamped in place when the bolt is tightened.
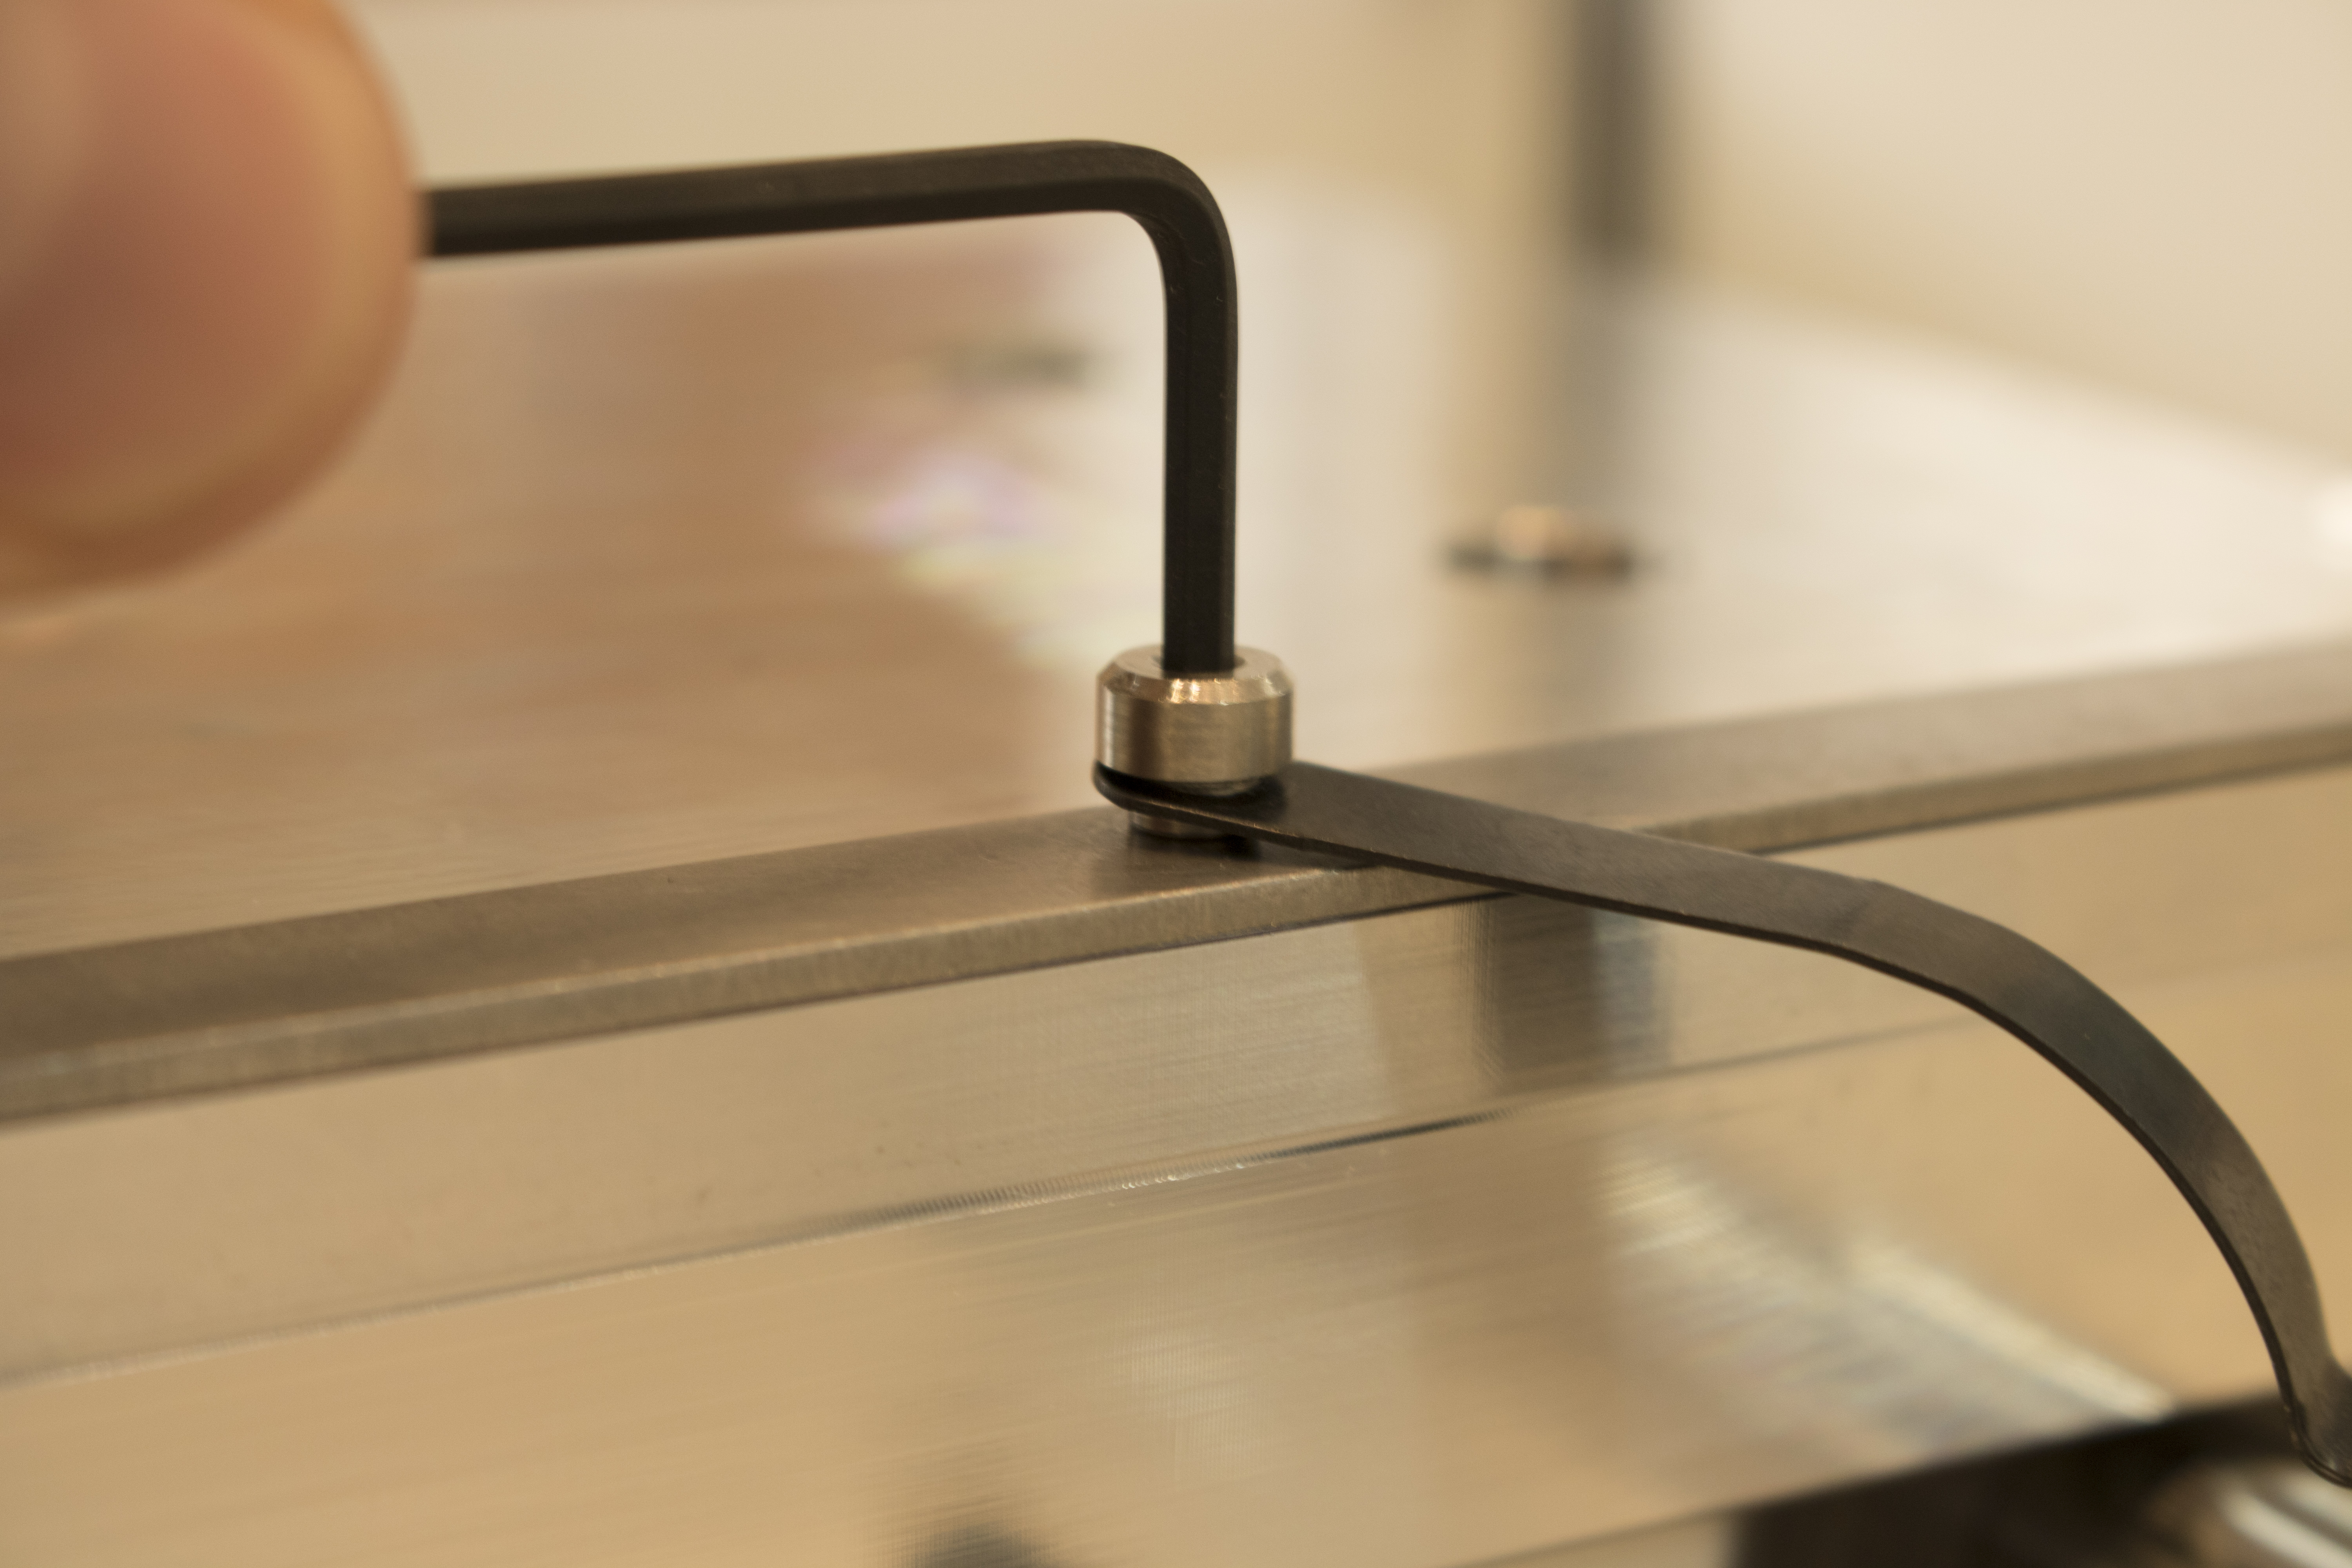
It can be helpful to move the Y carriage to a position that allows for the probing clip to hang below the surface of the spoilboard when installing it.
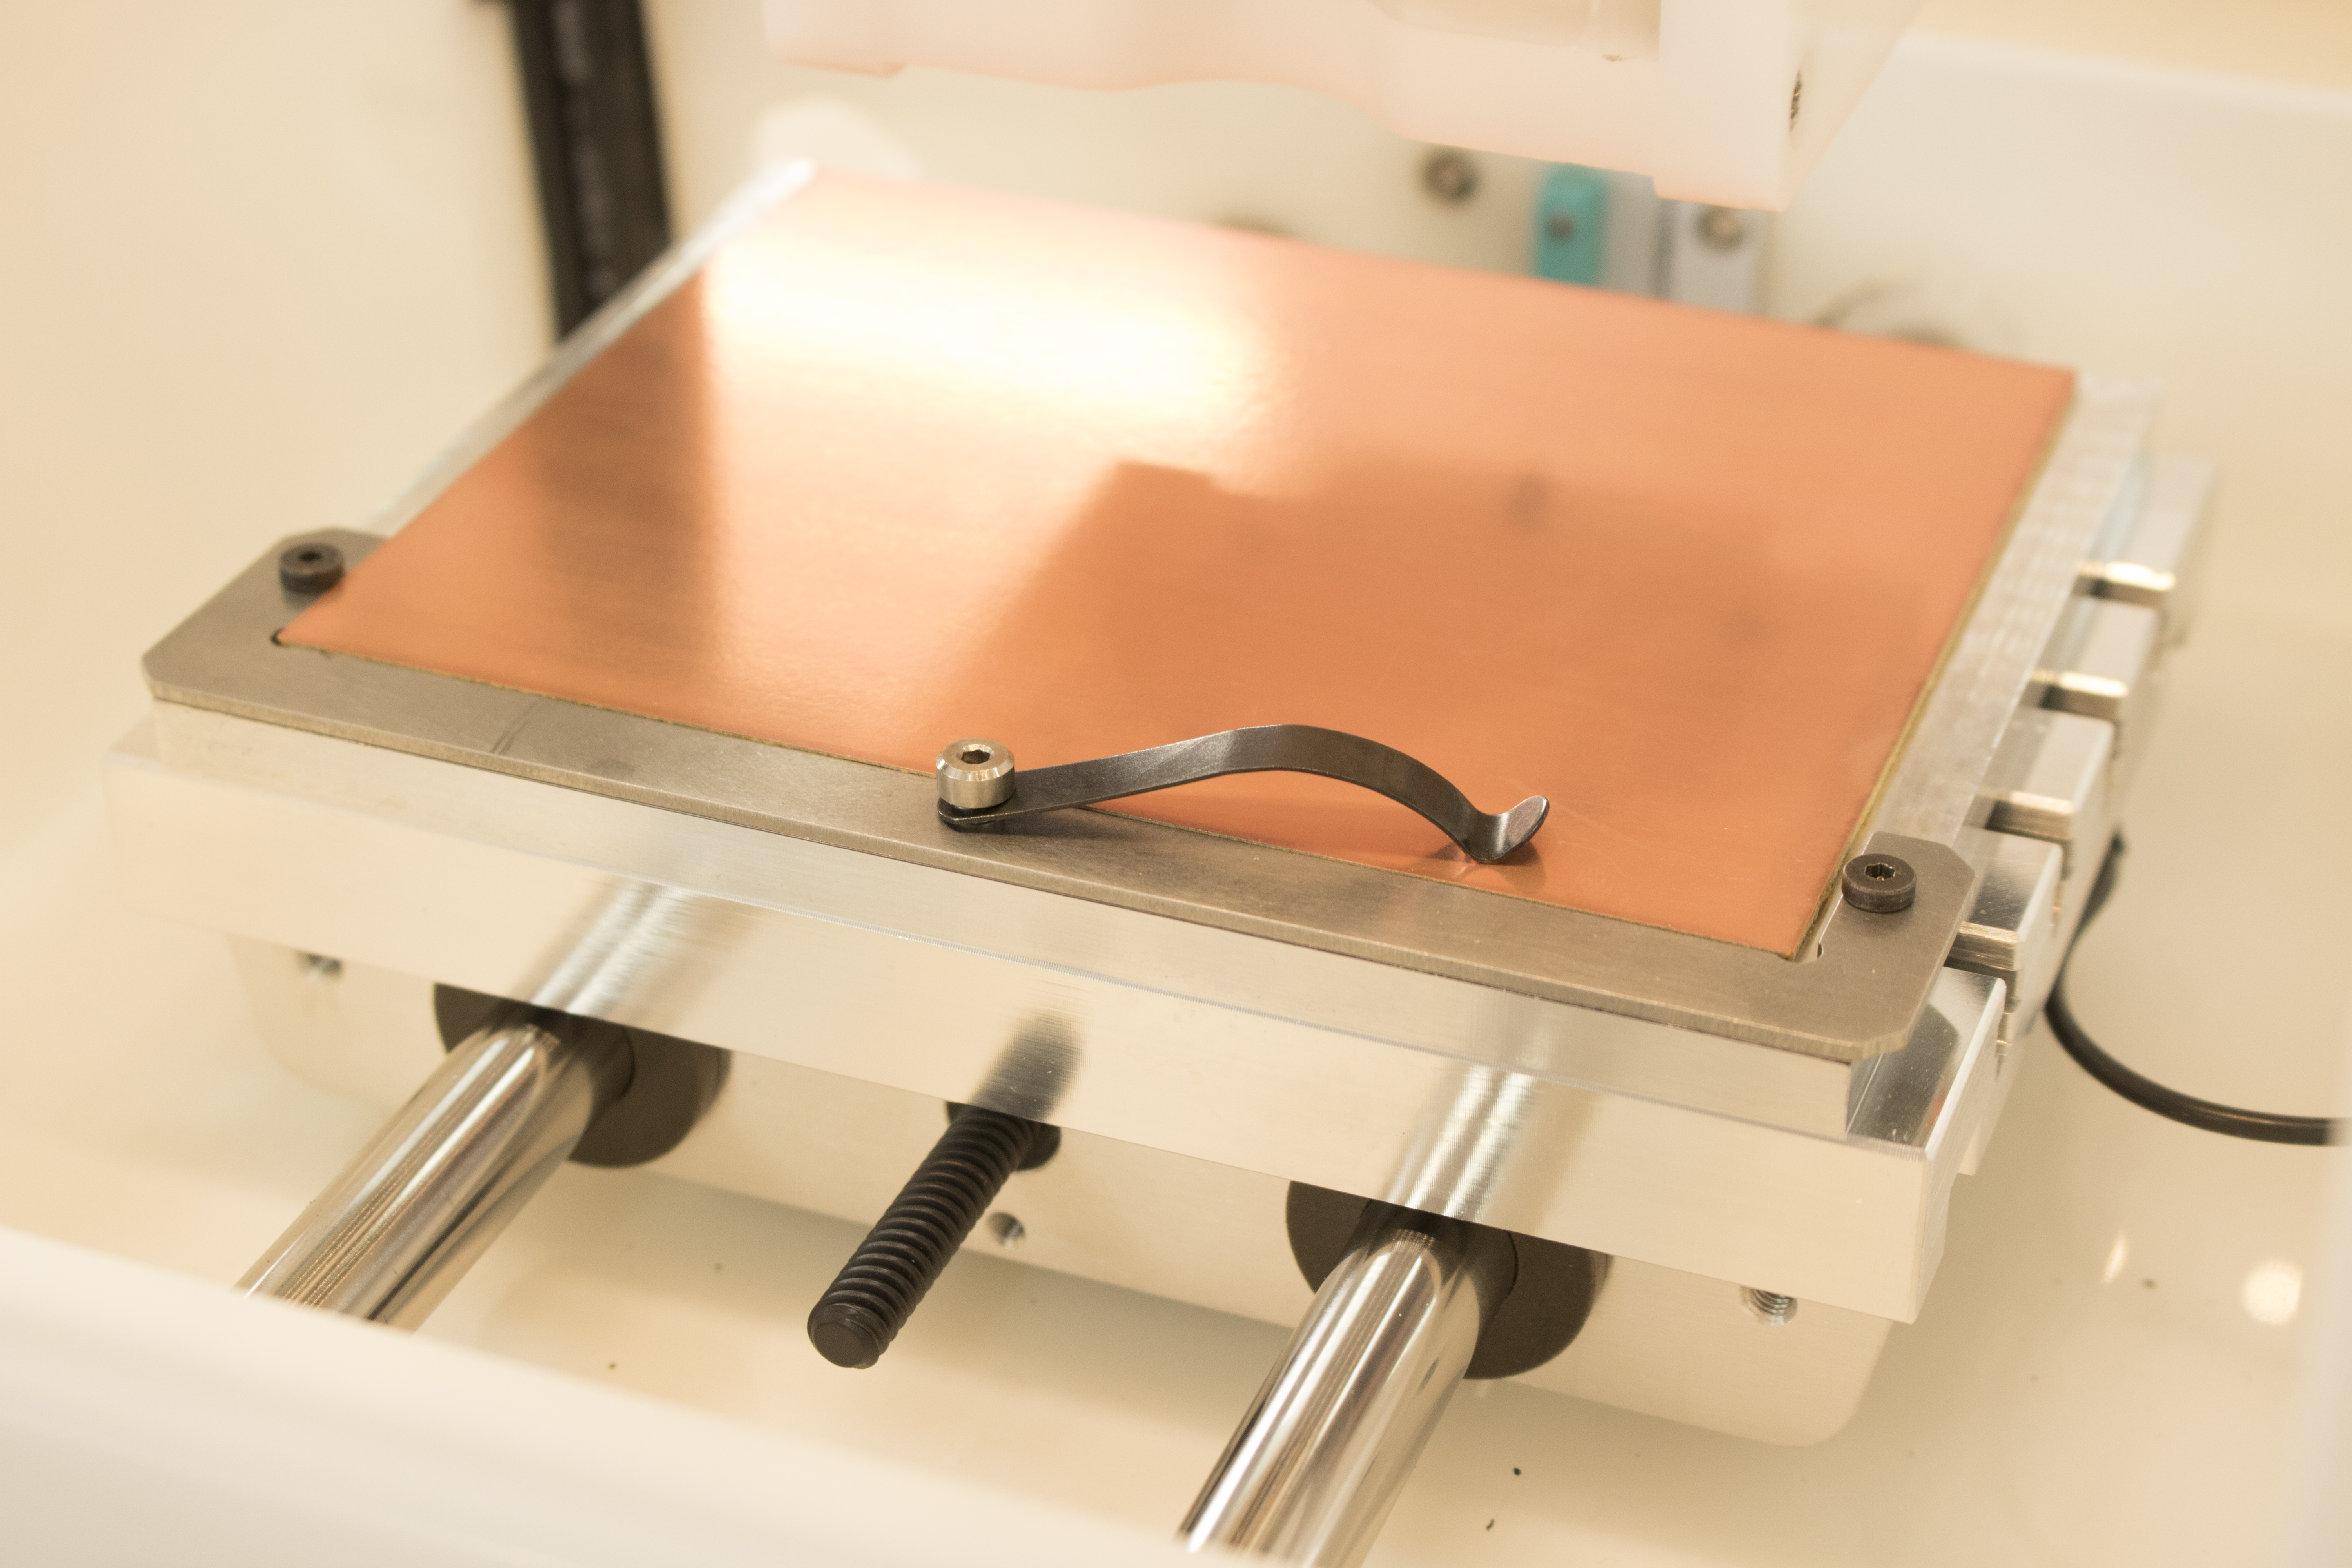
During normal operation, stow the probing clip on top of the Alignment Bracket or alongside the spoilboard, out of the way of your material and the toolpaths that will mill it.
Probing Material Thickness
The Bantam Tools Desktop PCB Milling Machine Software supports Material Thickness Probing. In Version 1.2, the feature is located in the BitBreaker menu. This feature will walk you through placing the probing clip on the material, probing the material, and returning the probing clip to its resting position.
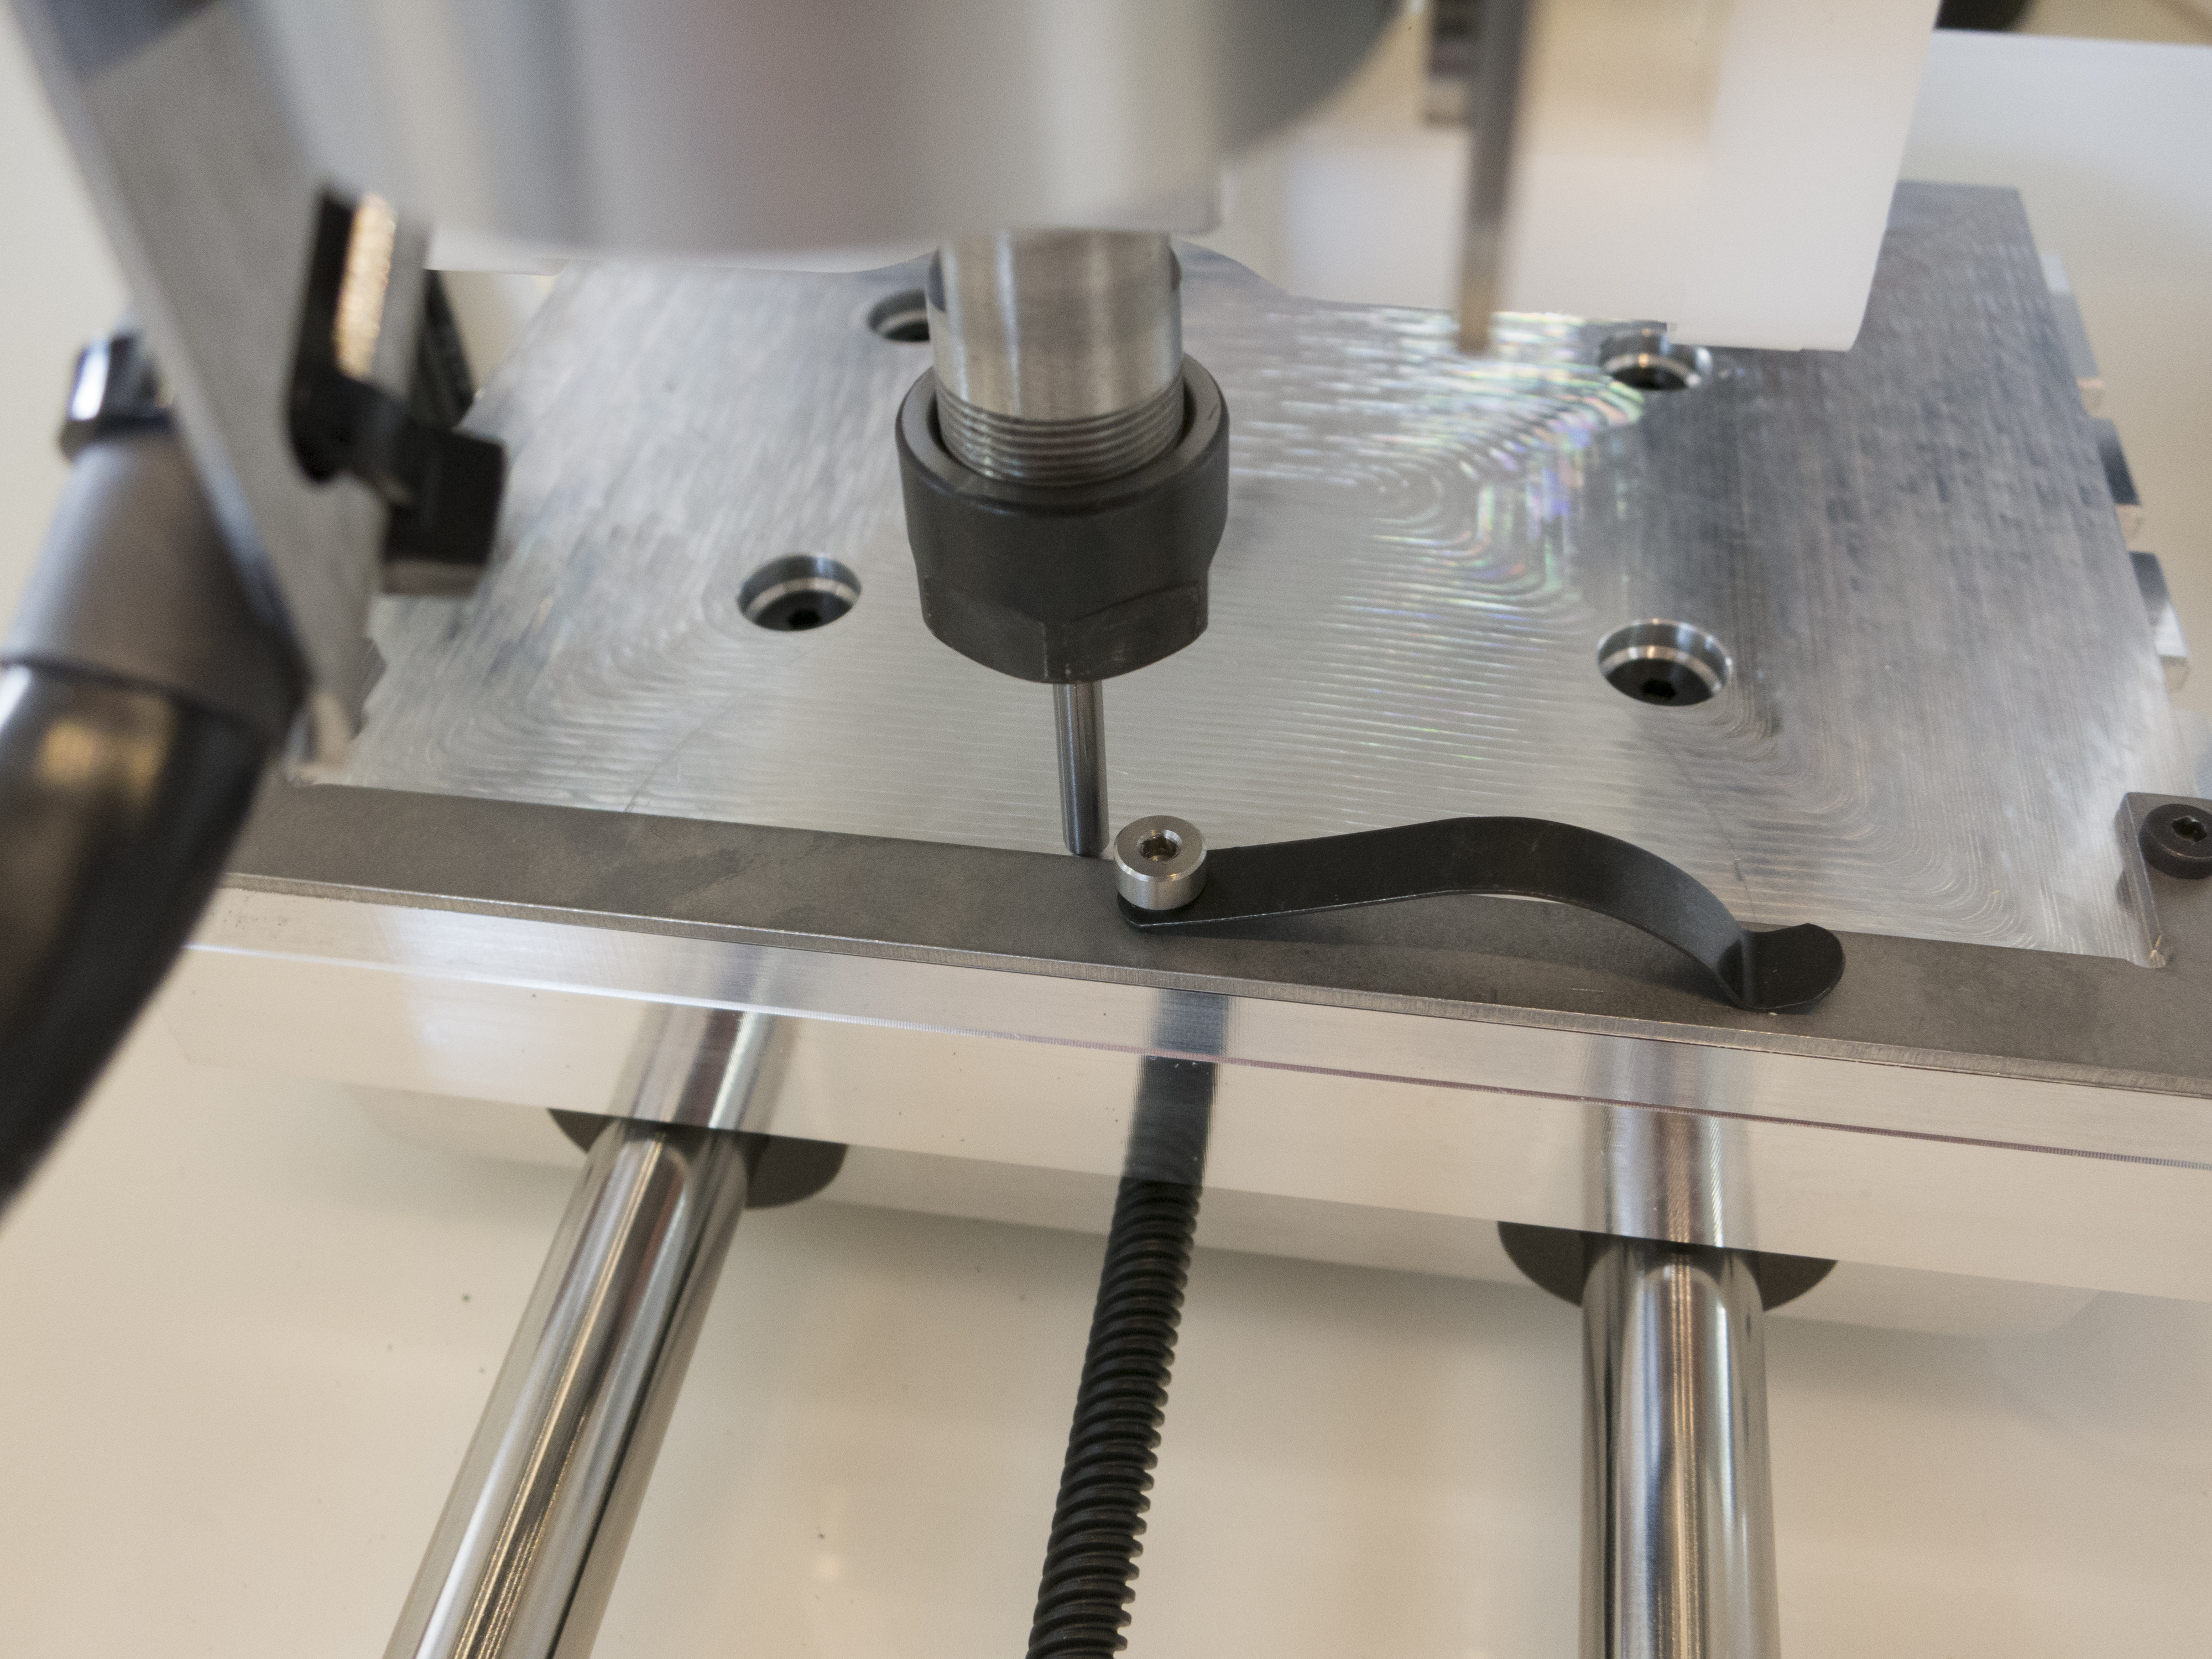
When prompted, simply lift the end of the probing clip and swing it over your material. Place the end of the probing clip so it's in direct contact with your material.
The clip works by electrically connecting the PCB material with the bed.
When the probing is complete, always remember to move the clip back to the resting position off of the material so your cutting tool doesn't collide with it.
Probing Other Materials
The Material Thickness Probing function was designed for PCB stock but will work with any thin, electrically conductive material.
Always make sure the clip is in place before starting the probe sequence. If an electrical connection between the material and bed is not made, the tool may plunge too far and cause damage to the tool and material.
Always move the clip off of the material before beginning a milling job. If the clip is left in place, the cutting tool may collide with it.
When locating the Alignment Bracket, the bracket edge is probed just to the left of the center mounting bolt. If the clip is installed in the center mounting hole, leave the clip resting to the right of the hole to avoid interfering with the bracket-locating process.