The Bantam Tools Desktop CNC Spindle House Assembly is an essential component for keeping your Bantam Tools Desktop CNC Milling Machine working smoothly and prototyping parts. It’s literally the beating heart of your CNC machine. Regularly cleaning your machine and performing routine maintenance checks will help keep your machine running optimally and prolong the life of your Bantam Tools Desktop CNC Milling Machine. But over time, the spindle house assembly will wear out, and we want to make sure you’re back up and running as soon as possible.
In this guide, we cover how to:
- Remove and install a Bantam Tools Desktop CNC Spindle House Assembly
- Test the spindle house assembly
- Package an old Bantam Tools Desktop CNC Spindle House Assembly, so you can send it to Bantam Tools HQ
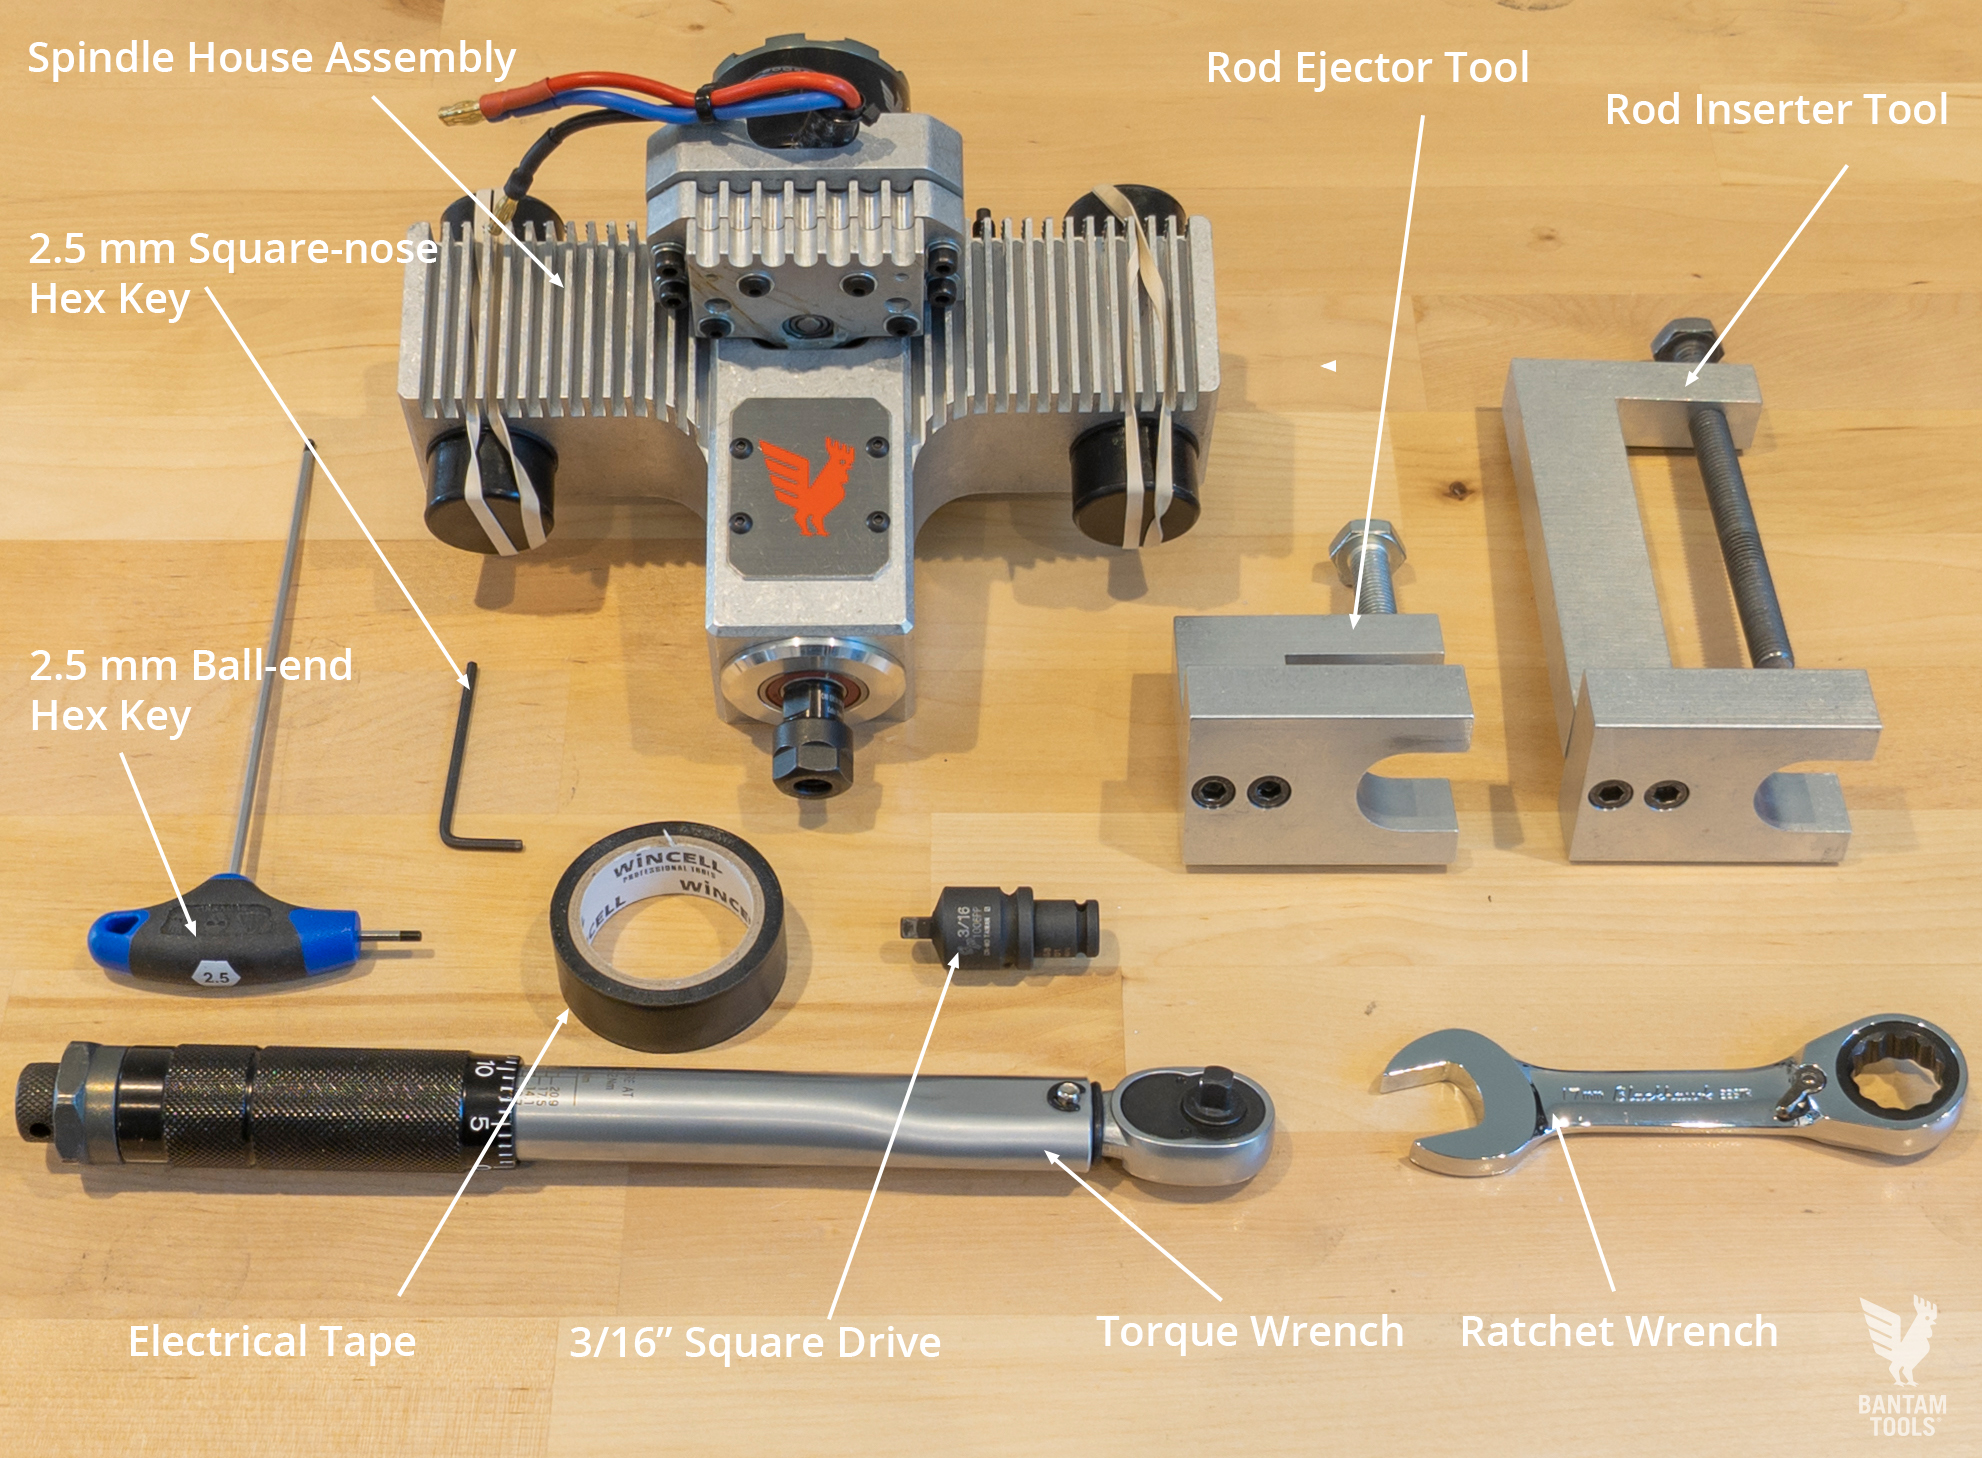
To swap in a new Bantam Tools Desktop CNC Spindle House Assembly, you’ll need:
- Computer with the Bantam Tools Milling Machine Software installed
- Assembled Bantam Tools Desktop CNC Spindle House
- Rod ejector tool, small
- Rod inserter tool, large
- Ratchet wrench
- Torque wrench
- Square drive, 3/16”
- Hex key, T-handle ball-end, 2.5 mm
- Hex key, square-nose, 2.5 mm
- Electrical tape
- Threadlocker
- Shop vacuum
With the exception of the computer and shop vacuum, each of these items comes with the Bantam Tools Desktop CNC Spindle House Assembly Replacement Kit.
Additionally, the kit includes:
- Bearing plugs (4)
- Rubber bands (4)
- Return label and packaging
These additional items enable you to ship your old spindle house assembly back to our HQ in Peekskill, NY. When you send an old spindle house assembly back to us, we’ll recycle it properly and refund you $75.
Okay, let’s start installing! Please be aware that replacing the spindle house assembly takes some time—about . Be patient, and if you have any questions, you can reach out to our support team at support@bantamtools.com.
Step 1: Jog the XZ-carriage into position.
Power on the Bantam Tools Desktop CNC Milling Machine, and connect it to your computer using the USB cable. Then launch the Bantam Tools Milling Machine Software and follow the on-screen instructions to home the mill.
Go to the Jog tab, toggle to “Jog”, and use the controls so that the XZ-carriage is roughly in the middle of the machine. Then move the machining bed all the way to the front of the machine by clicking the Loading button on the left side of the menu.

If you have a Bantam Tools Desktop CNC Fixturing Pallet installed, remove it. Using the hex key that came with your machine, loosen the screws and remove the pallet. This will provide you with more room to move the carriages around and use your tools to replace the spindle house assembly. If you need more guidance for removing the pallet, see our Installing the Bantam Tools Desktop CNC Fixturing Pallet guide.
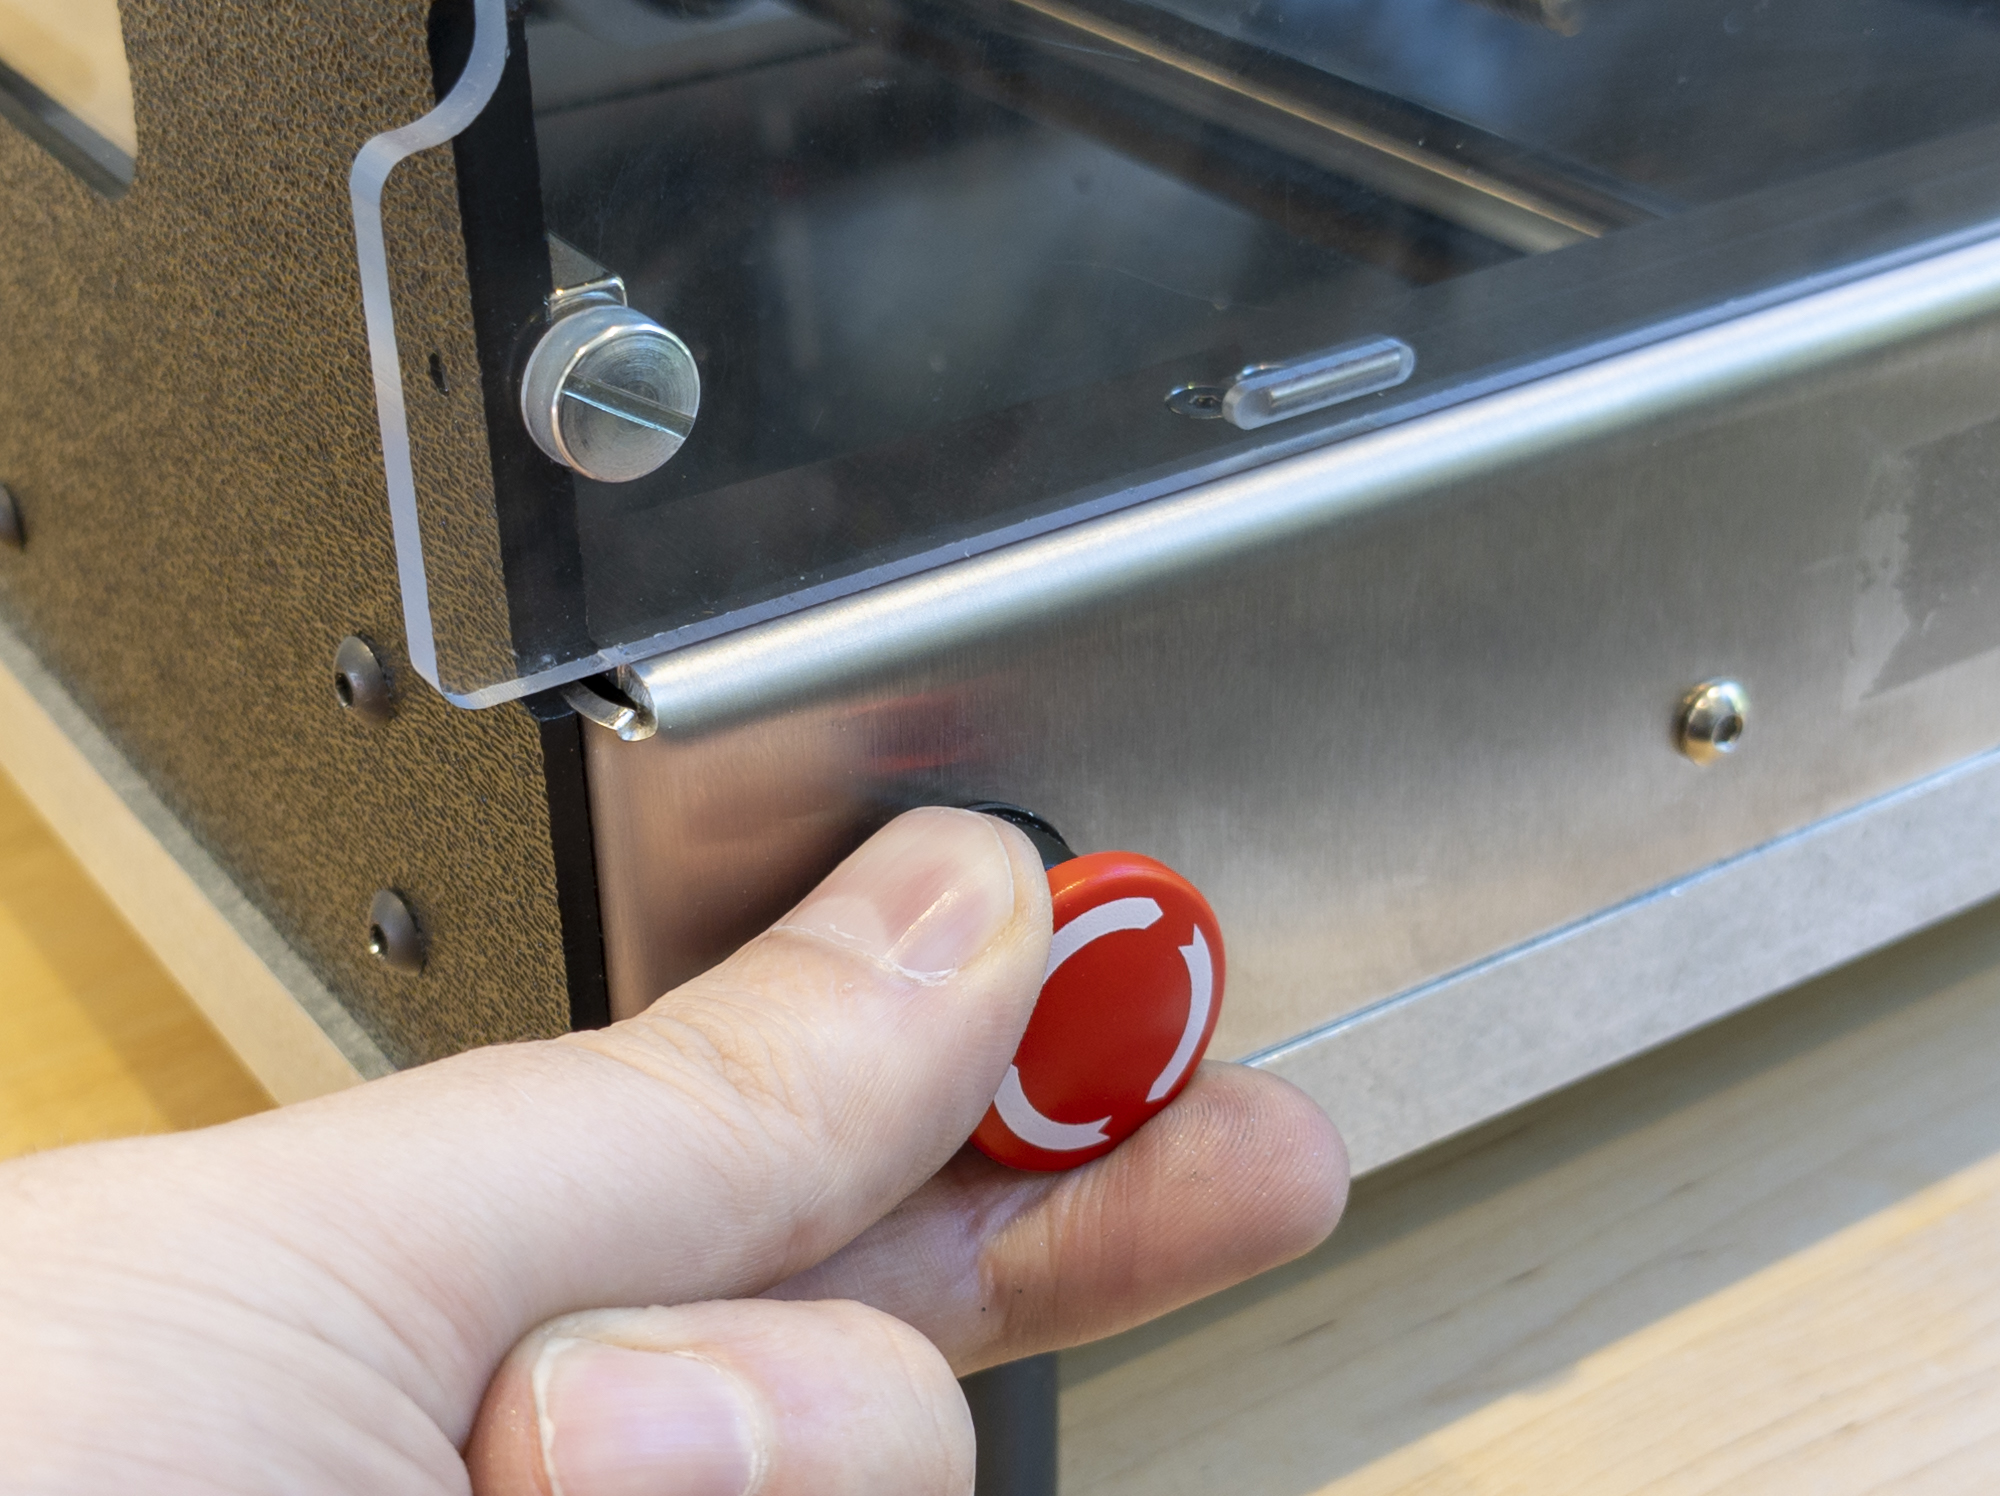
Additionally, if you have an end mill or probing pin installed into the machine, remove it now. When you’re finished, engage the E-stop button, turn off the Bantam Tools Desktop CNC Milling Machine, and unplug it.
Step 2: Remove the top panel.
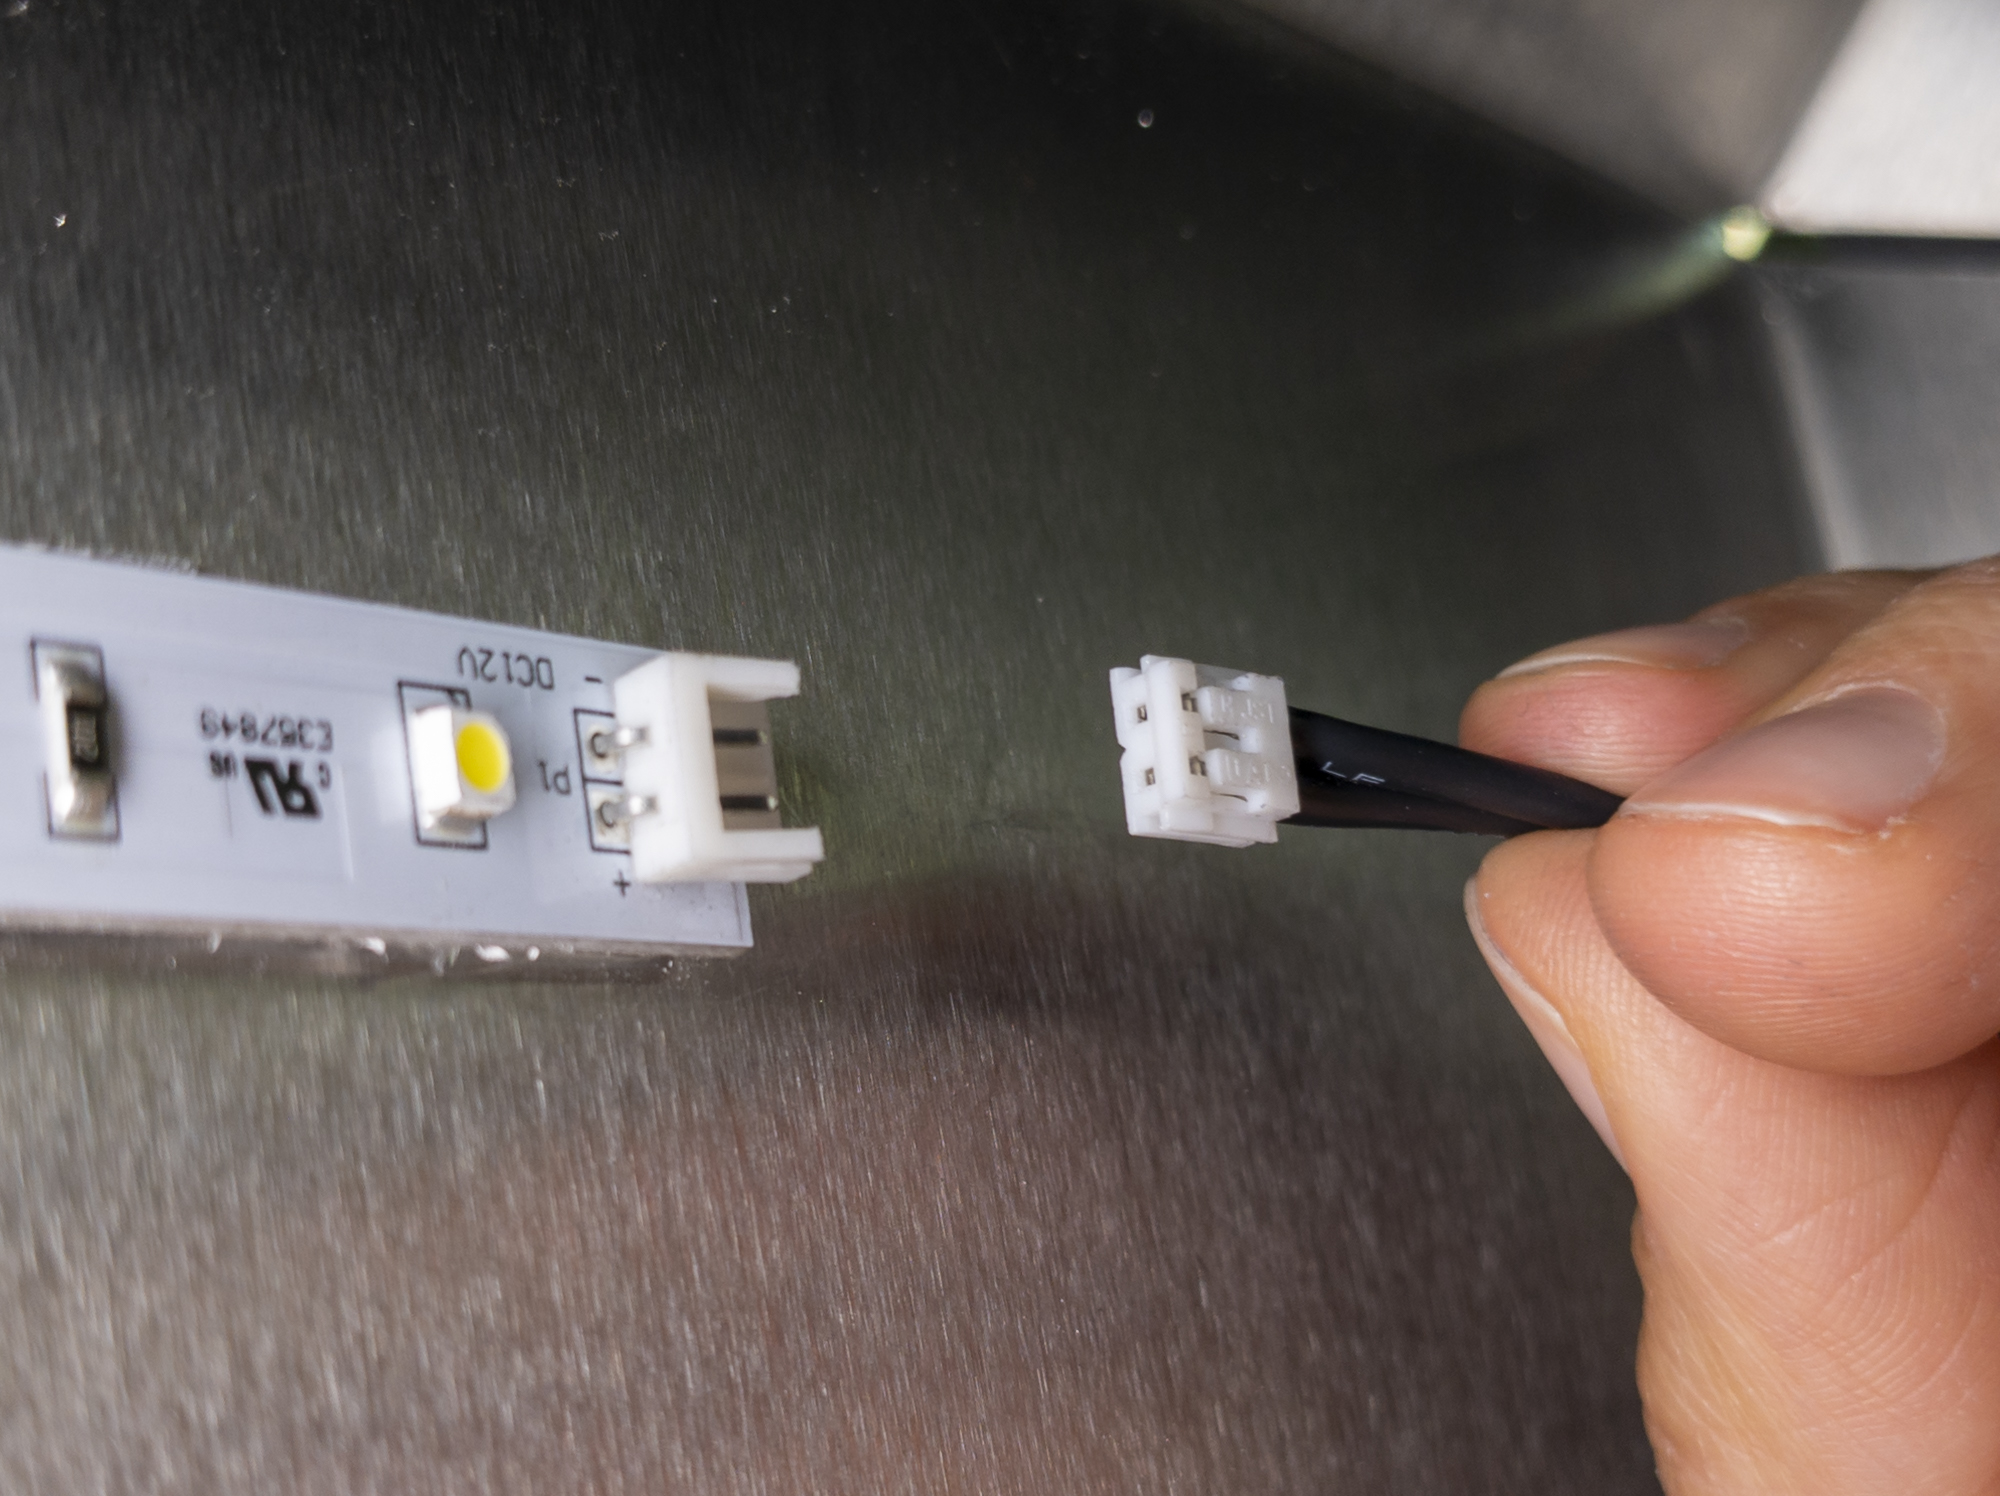
For this step you’ll need the 2.5 mm ball-end hex key. Before you remove the Bantam Tools Desktop CNC Milling Machine’s top panel, you’ll first need to disconnect the LED strip that’s located on the underside of the pane by unplugging the connector.
Next, snap the safety door into place (like you would to run a job). Then, use the square-nose hex key to remove the screws holding the top panel in place. Start from the back and work your way to the front. When you get to the front, use your free hand to hold the panel into place, and then carefully remove the front screws.

Put one hand on each side of the safety lock door. Pull the door out and immediately lift up, using the back of the machine to anchor the top panel.
Tip: Having someone help you with this step makes removing the top panel easier.
Step 3: Vacuum out the XZ-carriage.
Grab your vacuum and clean the XZ-carriage. Vacuum as much excess dust and debris as possible. You may also notice that the X-brace in the back of the machine has gotten dirty from all the milling you've done. Take the time to clean it as well.
Note: Avoid using compressed air to blow out the chips and dust.
Step 4: Disconnect the wires.
Unplug the X-axis motor cable located on the left side of the machine and the Z-axis motor cable located on the top of the Z-carriage. There are times in the replacement process that you may need to move the XZ-carriage.
Important: Unless you unplug the X- and Z-axis motor cables, you can’t move the carriage. Doing so while these cables are plugged in creates an electrical current that will damage the circuit boards in the electronics backpack.

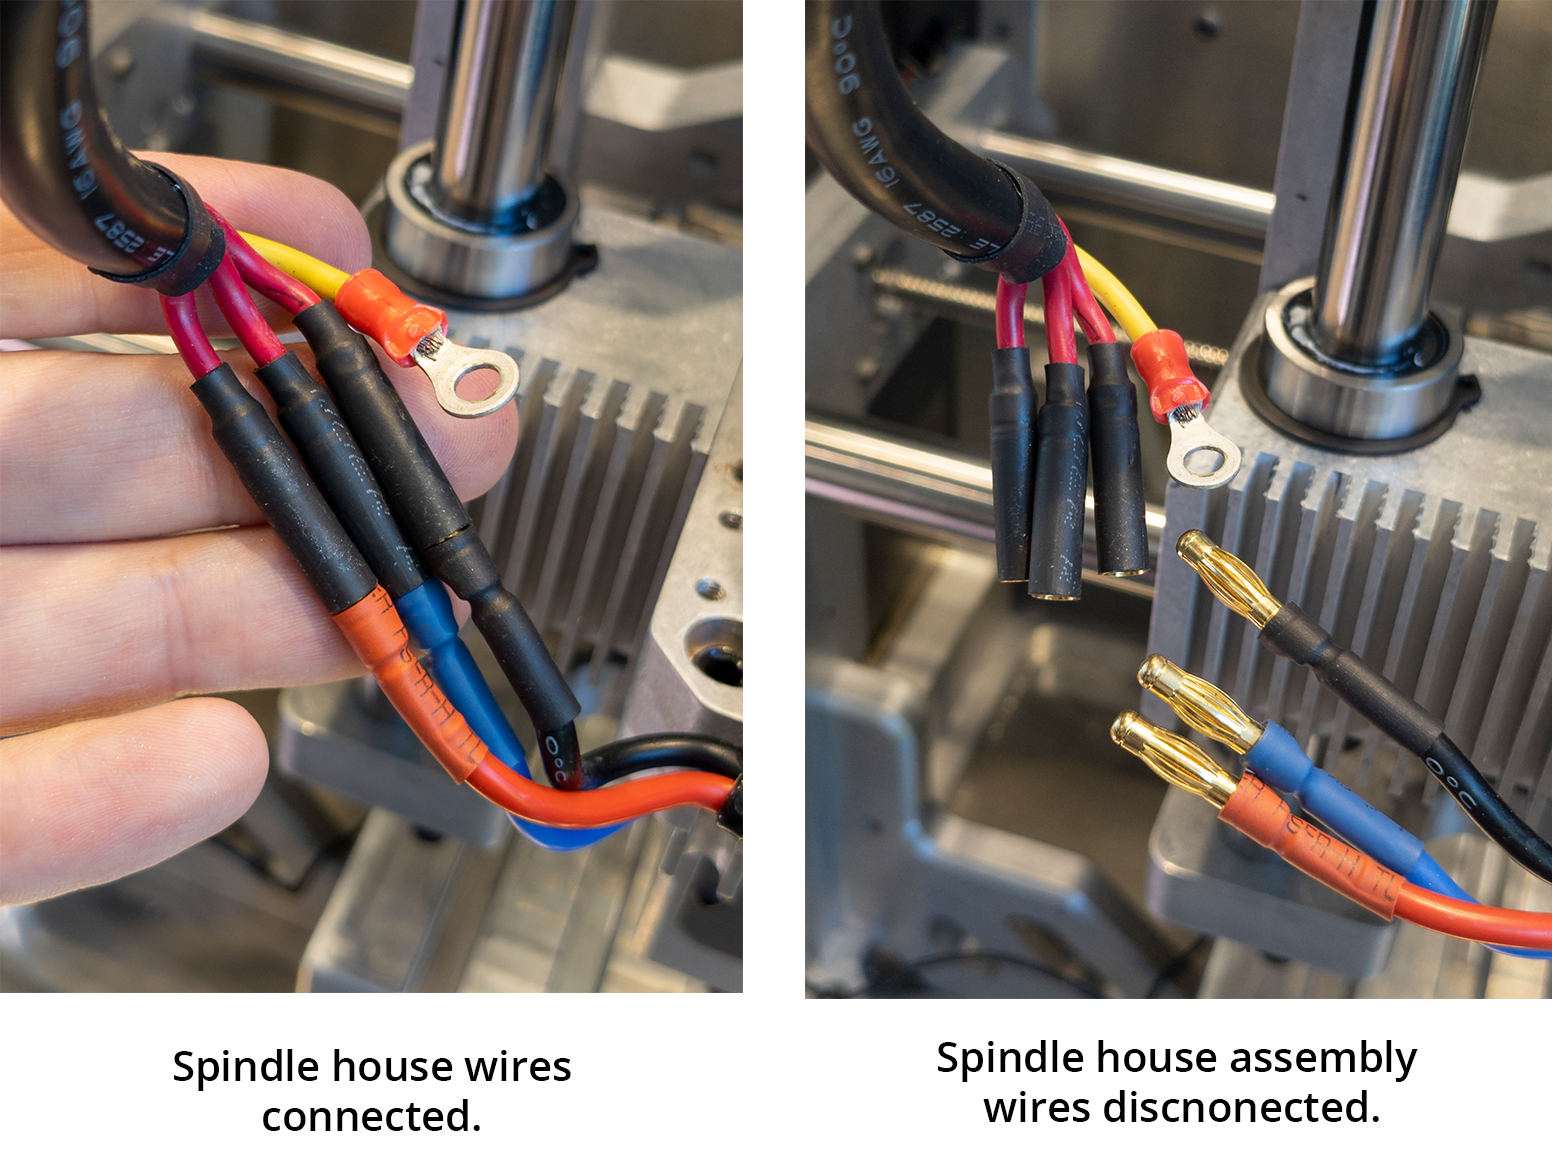
Now that you’ve unplugged the X- and Z-axis motor plugs, let’s unplug the Bantam Tools Desktop CNC Spindle House Assembly. Use the 2.5 mm square-nose hex key to unscrew the ground plug. Hang onto the screen and strain relief clamp (the black band that buckles the wiring to the spindle house assembly). Set them aside with the other parts you’ve removed from the machine so far.

With the spindle house assembly’s wires free, you can now disconnect the wires using your hands.
Step 5: Unscrew the ABN nut.
For this step, you’ll need the two hex keys: square-nose and T-hand ball-end. Use the 2.5 mm square-nose hex key to break loose the three M4 x 25 screws on the ABN nut and then use the 2.5 mm ball-end hex key to remove the screws completely. The ABN nut is a little difficult to get to, so using the ball-end hex key will be ideal for this step.

When you’re finished, screw both parts of the ABN nut upward so that it’s out of the way when it’s time to remove the spindle house assembly.
Caution: Keep your fingers away from the spindle house assembly while removing the ABN nut. After you remove the screws from the nut, the spindle house assembly may drop, so be careful and watch your fingers.
Step 6: Remove the NPT plugs.
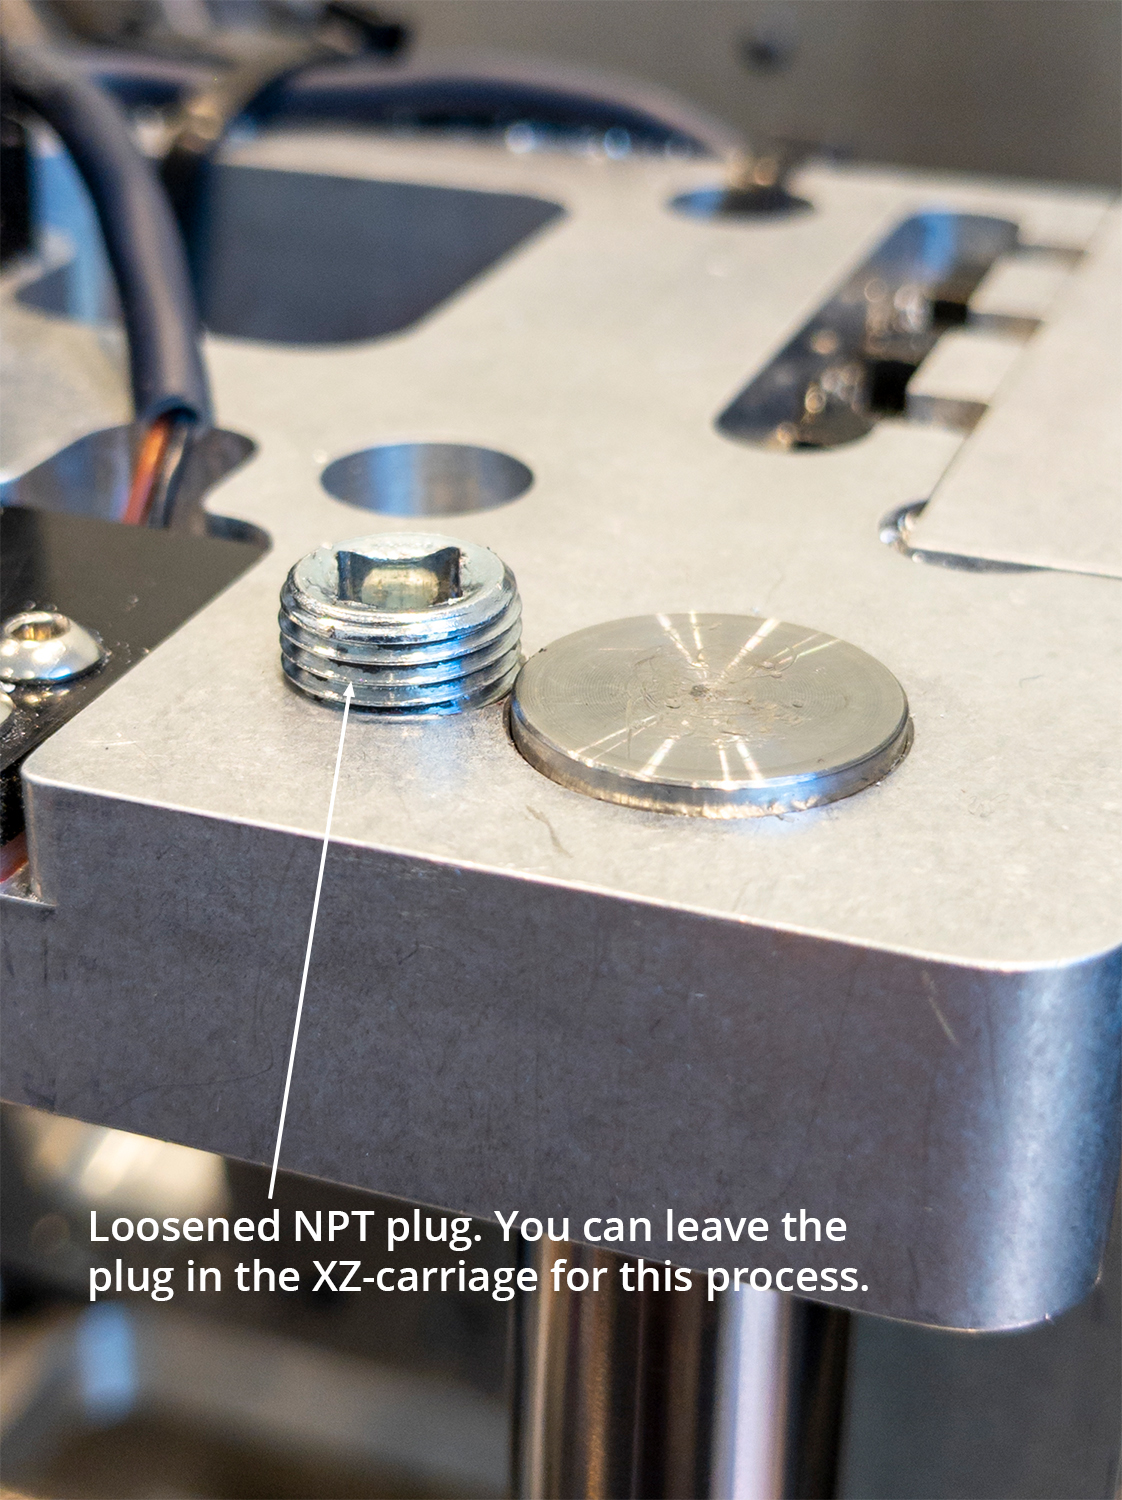
The NPT plugs hold the rods securely in place on the XZ-carriage. Before you can remove the rods, you will need to loosen these threaded plugs. There are two NPT plugs on the top and two on the bottom of the XZ-carriage.

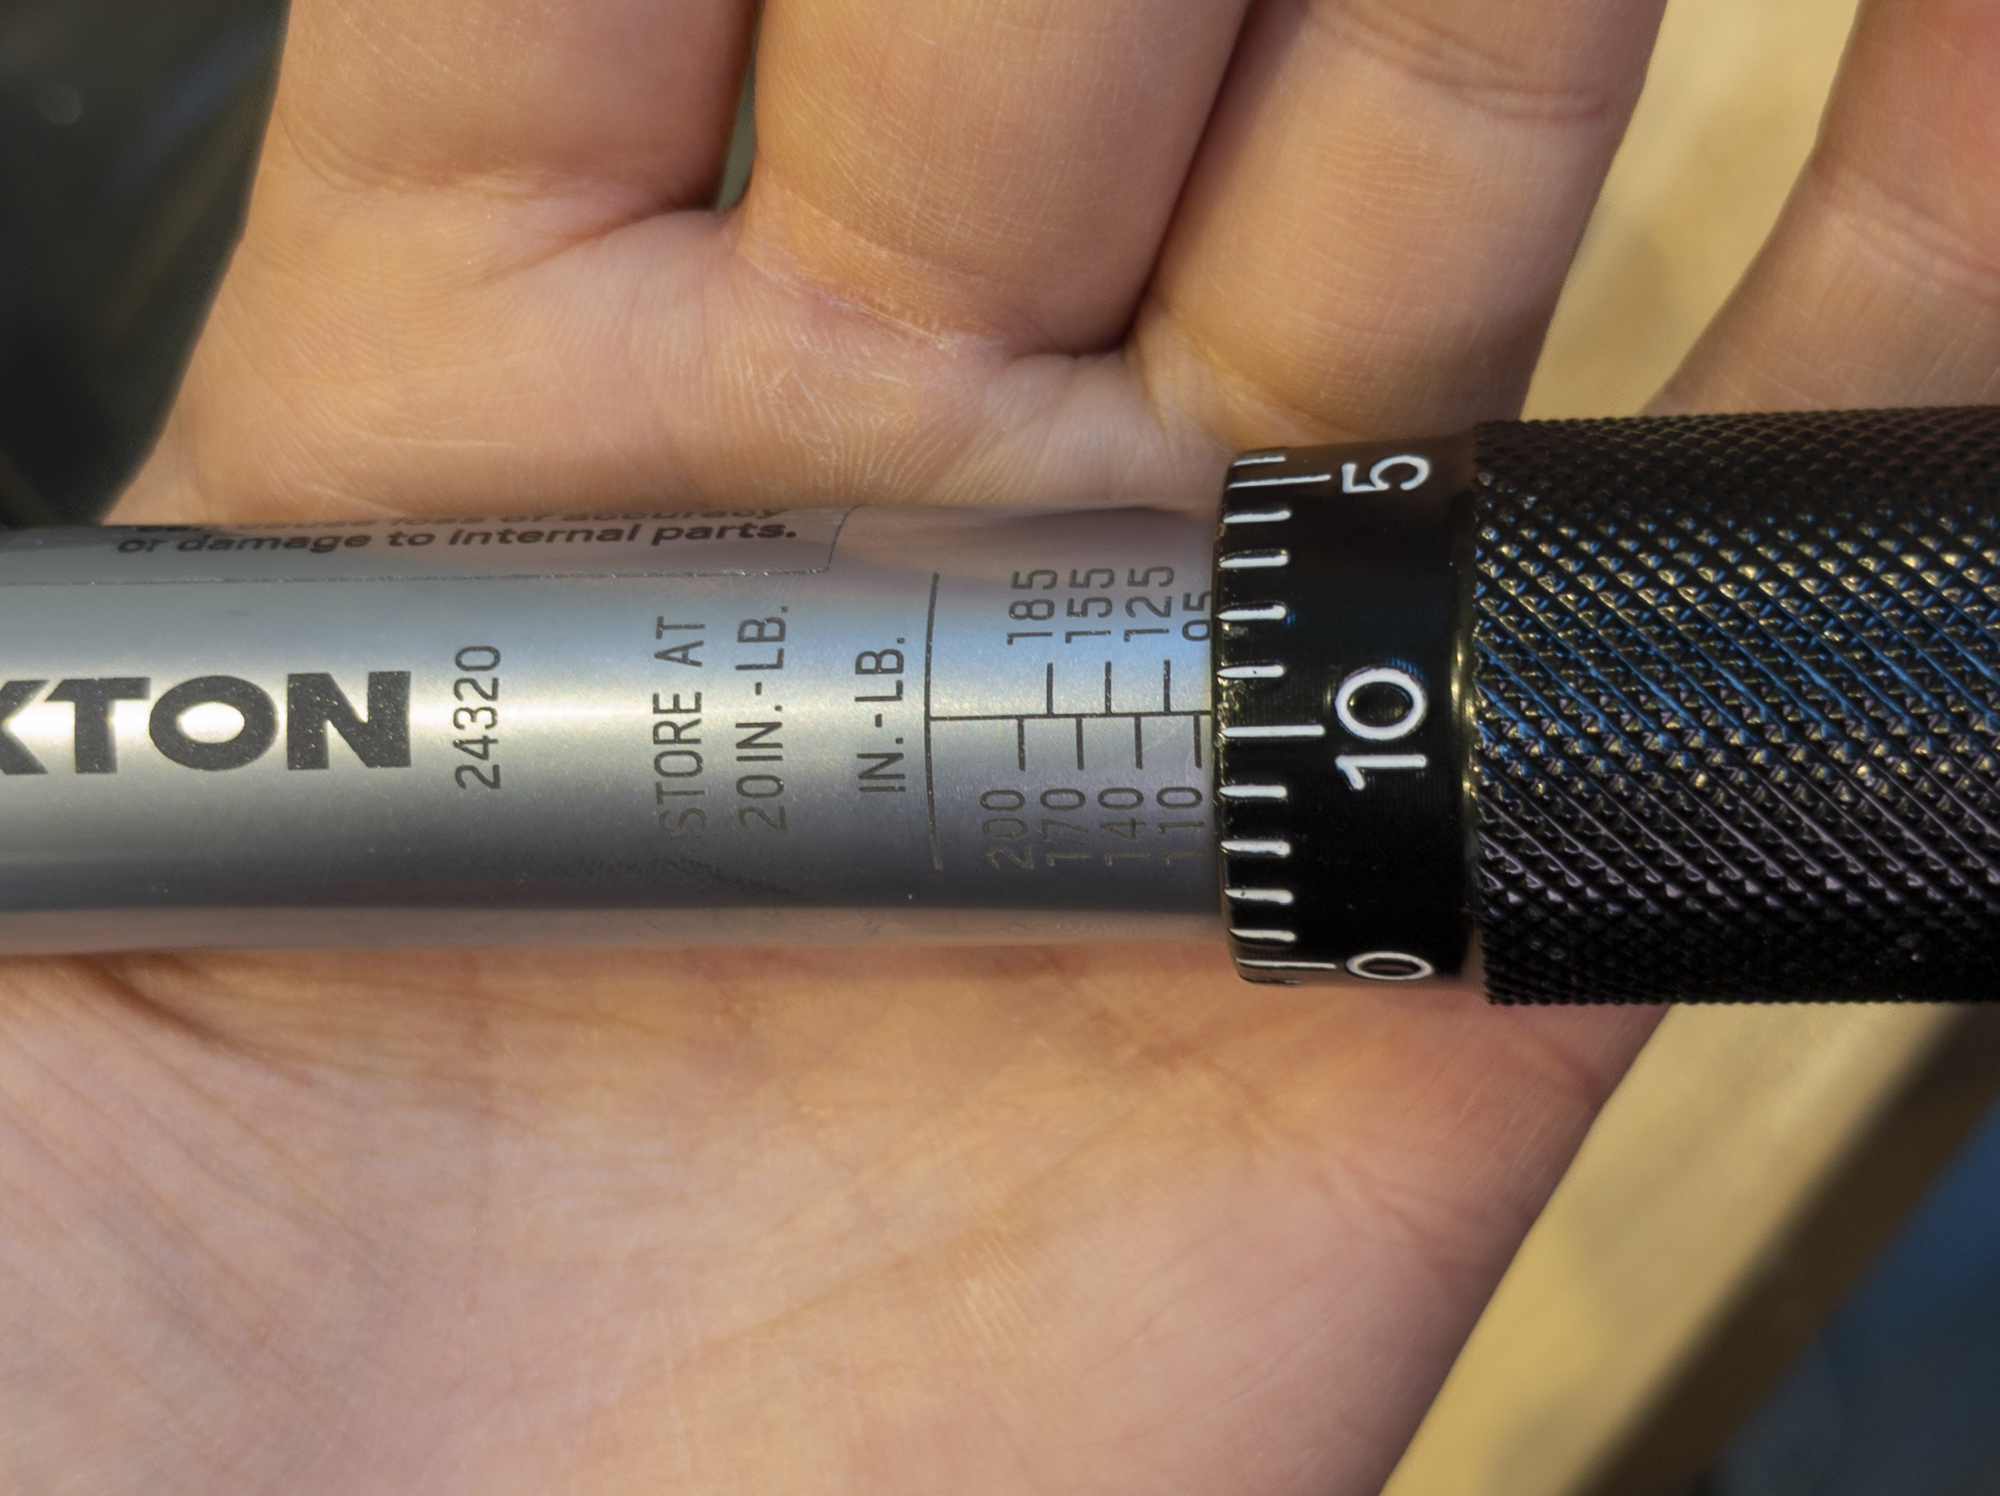
Place the 3/16” square drive into the torque wrench. We’ve preset the torque wrench to 100 pounds. Double-check that it’s still set correctly. If not, adjust it by unscrewing the bottom nut on the wrench, turn the top until the “10” is aligned with the centerline and “105” is the lowest visible number above the adjustable sleeve, and screw the bottom nut back into place when you’re finished.
Now place the square drive into the NPT plugs and loosen them. Don’t completely remove the plugs from the XZ-carriage. For this process, you can leave them in place.
Step 7: Remove the XZ-carriage rods.
Now, we’ll remove the vertical rods in the XZ-carriage using the custom rod ejector and inserter tools we designed. During the ejection and installation process, you should avoid hammering the rods in and out of place because this can potentially cause the XZ-carriage to become out of alignment. Misalignment may not be noticeable to the eye, but when it comes to CNC machining, every thousandth of an inch counts. These custom tools allow you to avoid having to use a hammer or yank on the rods.

Push the spindle house assembly upward, and place the rod ejector tool (the smaller tool) between the bottom of the XZ-carriage and the assembly. It’ll look like the image below.
Use the ratchet wrench to tighten the screw on your rod ejector tool. As you do, you’ll notice the rod start to move upward. Don’t stop until the screw is all the way tightened. Once it is, you can move it upward by hand so that it clears the top of the spindle house assembly.

In some cases, you may not be able to move the rod upward using your hands. Don’t try to force the rod out. Instead, take the longer, 120 mm screw from the rod inserter tool and install it into the rod ejector tool. Once you’ve installed the 120 mm screw, use the ratchet wrench to tighten the screw until the rod is clear of the spindle house.
Note: If you need to use the 120 mm screw, move the XZ-carriage to either the far left or right of the Bantam Tools Desktop CNC Milling Machine, so you can more easily insert and tighten the long screw, without bumping into the T-slot bed or pallet receiver.
Repeat the same process for the other rod.
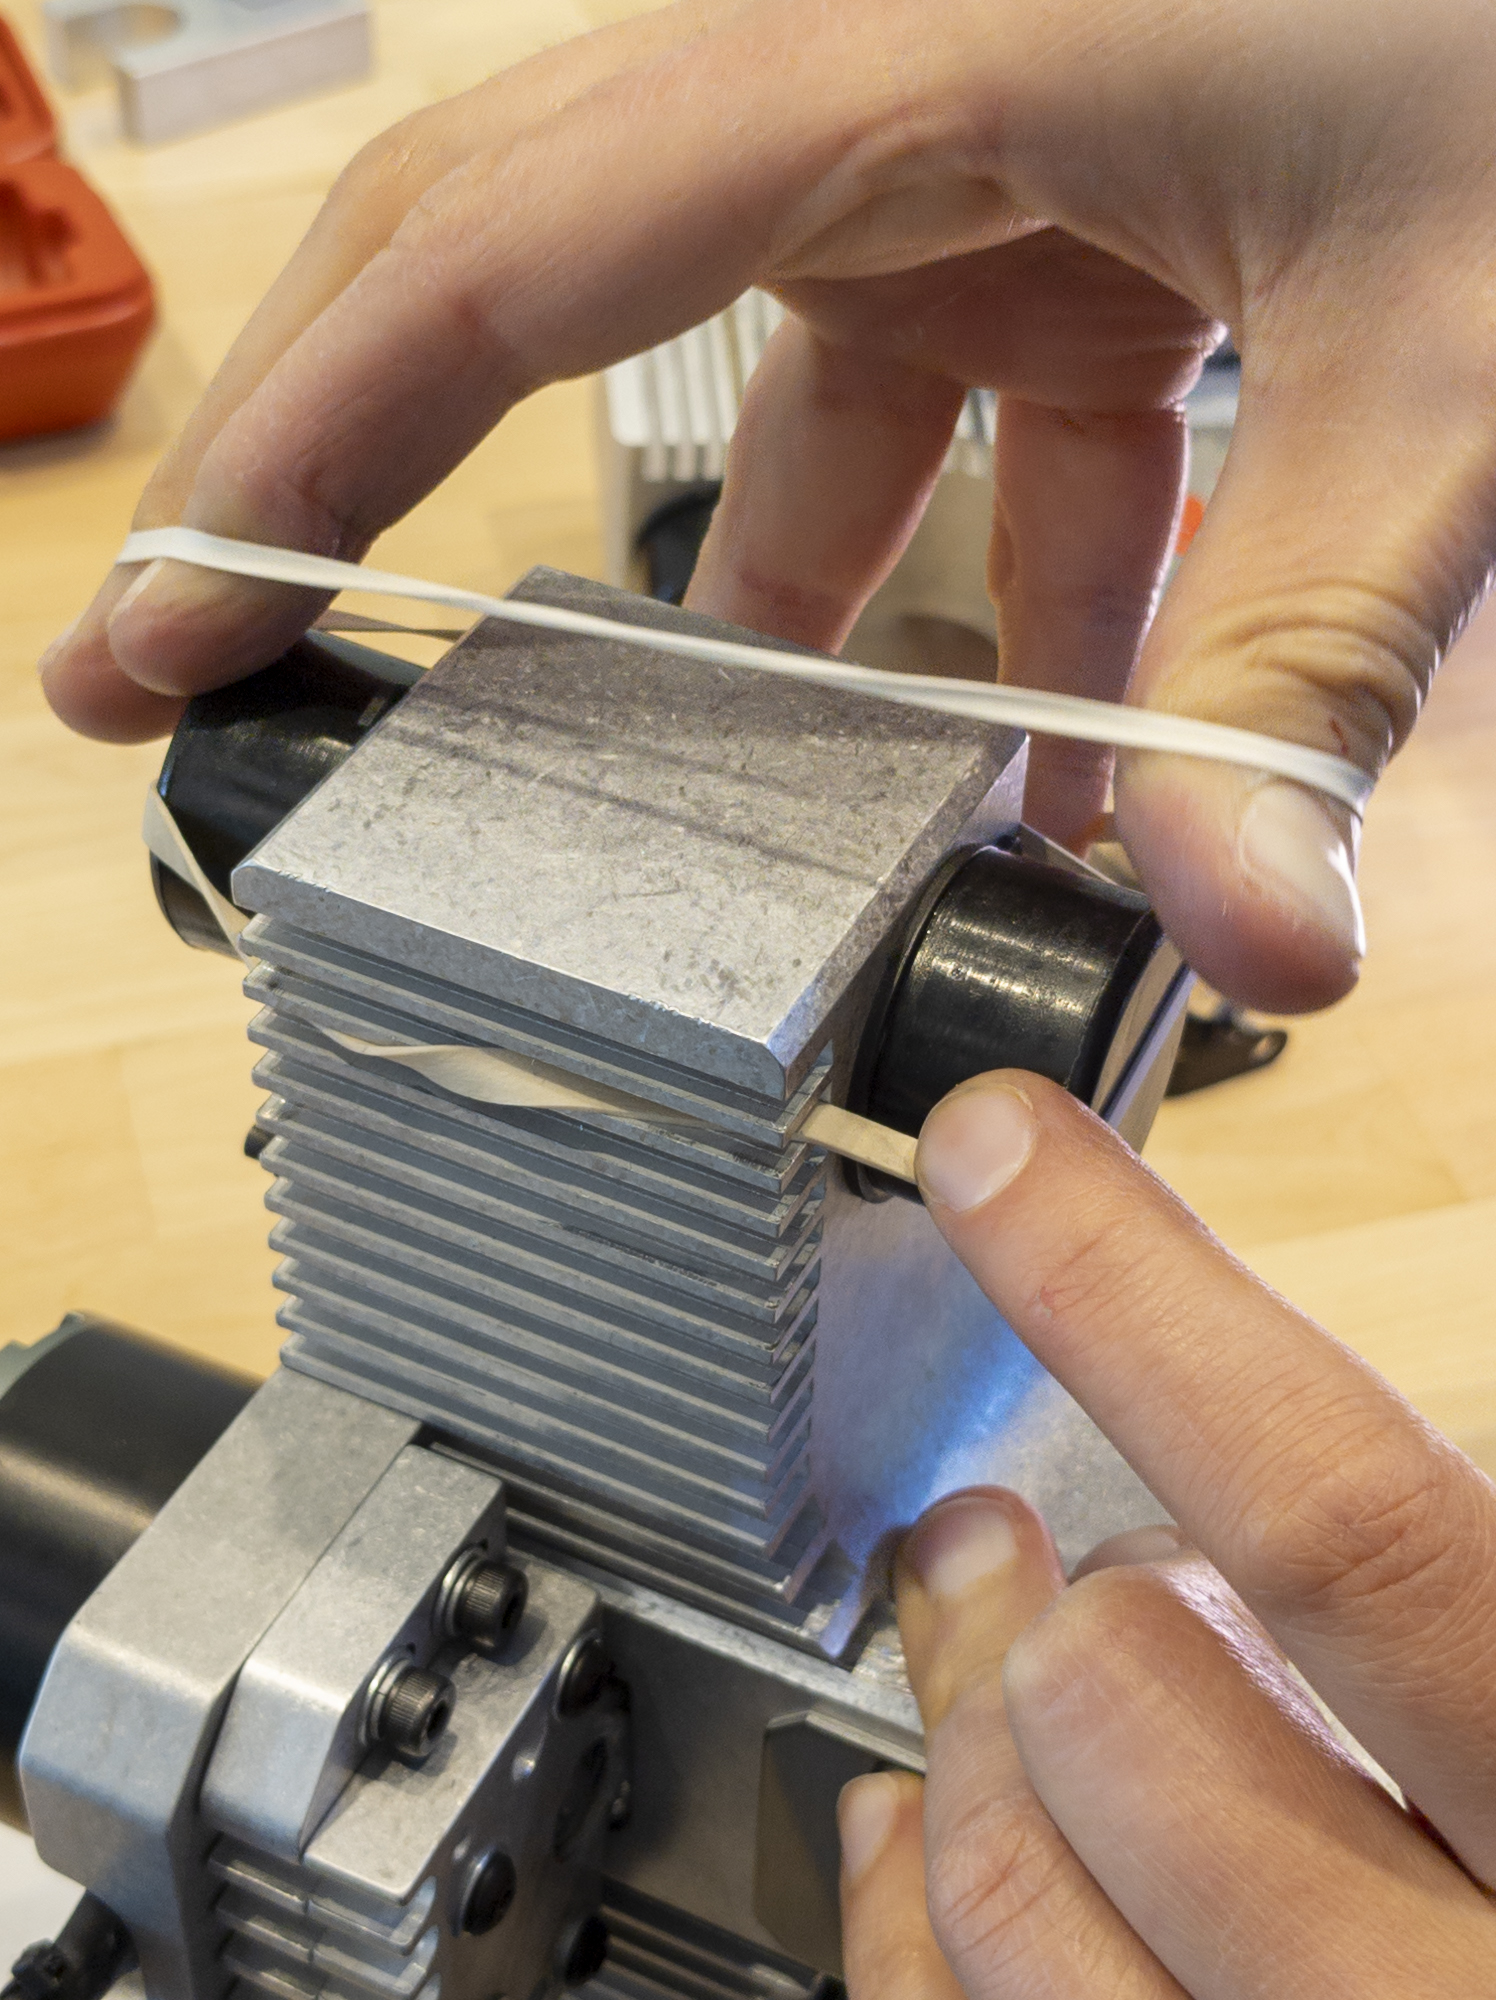
Step 8: Remove the spindle house assembly and package it.
Carefully remove the old spindle house assembly out of the Bantam Tools Desktop CNC Milling Machine, and immediately cover the bushing ends with the rubber caps. Wrap a rubber band around each cap to hold it into place and put the old assembly into the packaging provided. You’ll notice that we’ve also sent you a return label. If you send your old spindle house assembly back to Bantam Tools HQ, we’ll make sure its parts are recycled properly, and we’ll refund $75 of your order.
Note: If you have any questions about refunds, please contact our sales team at sales@bantamtools.com.
Step 9: Install the new spindle house assembly into the machine.
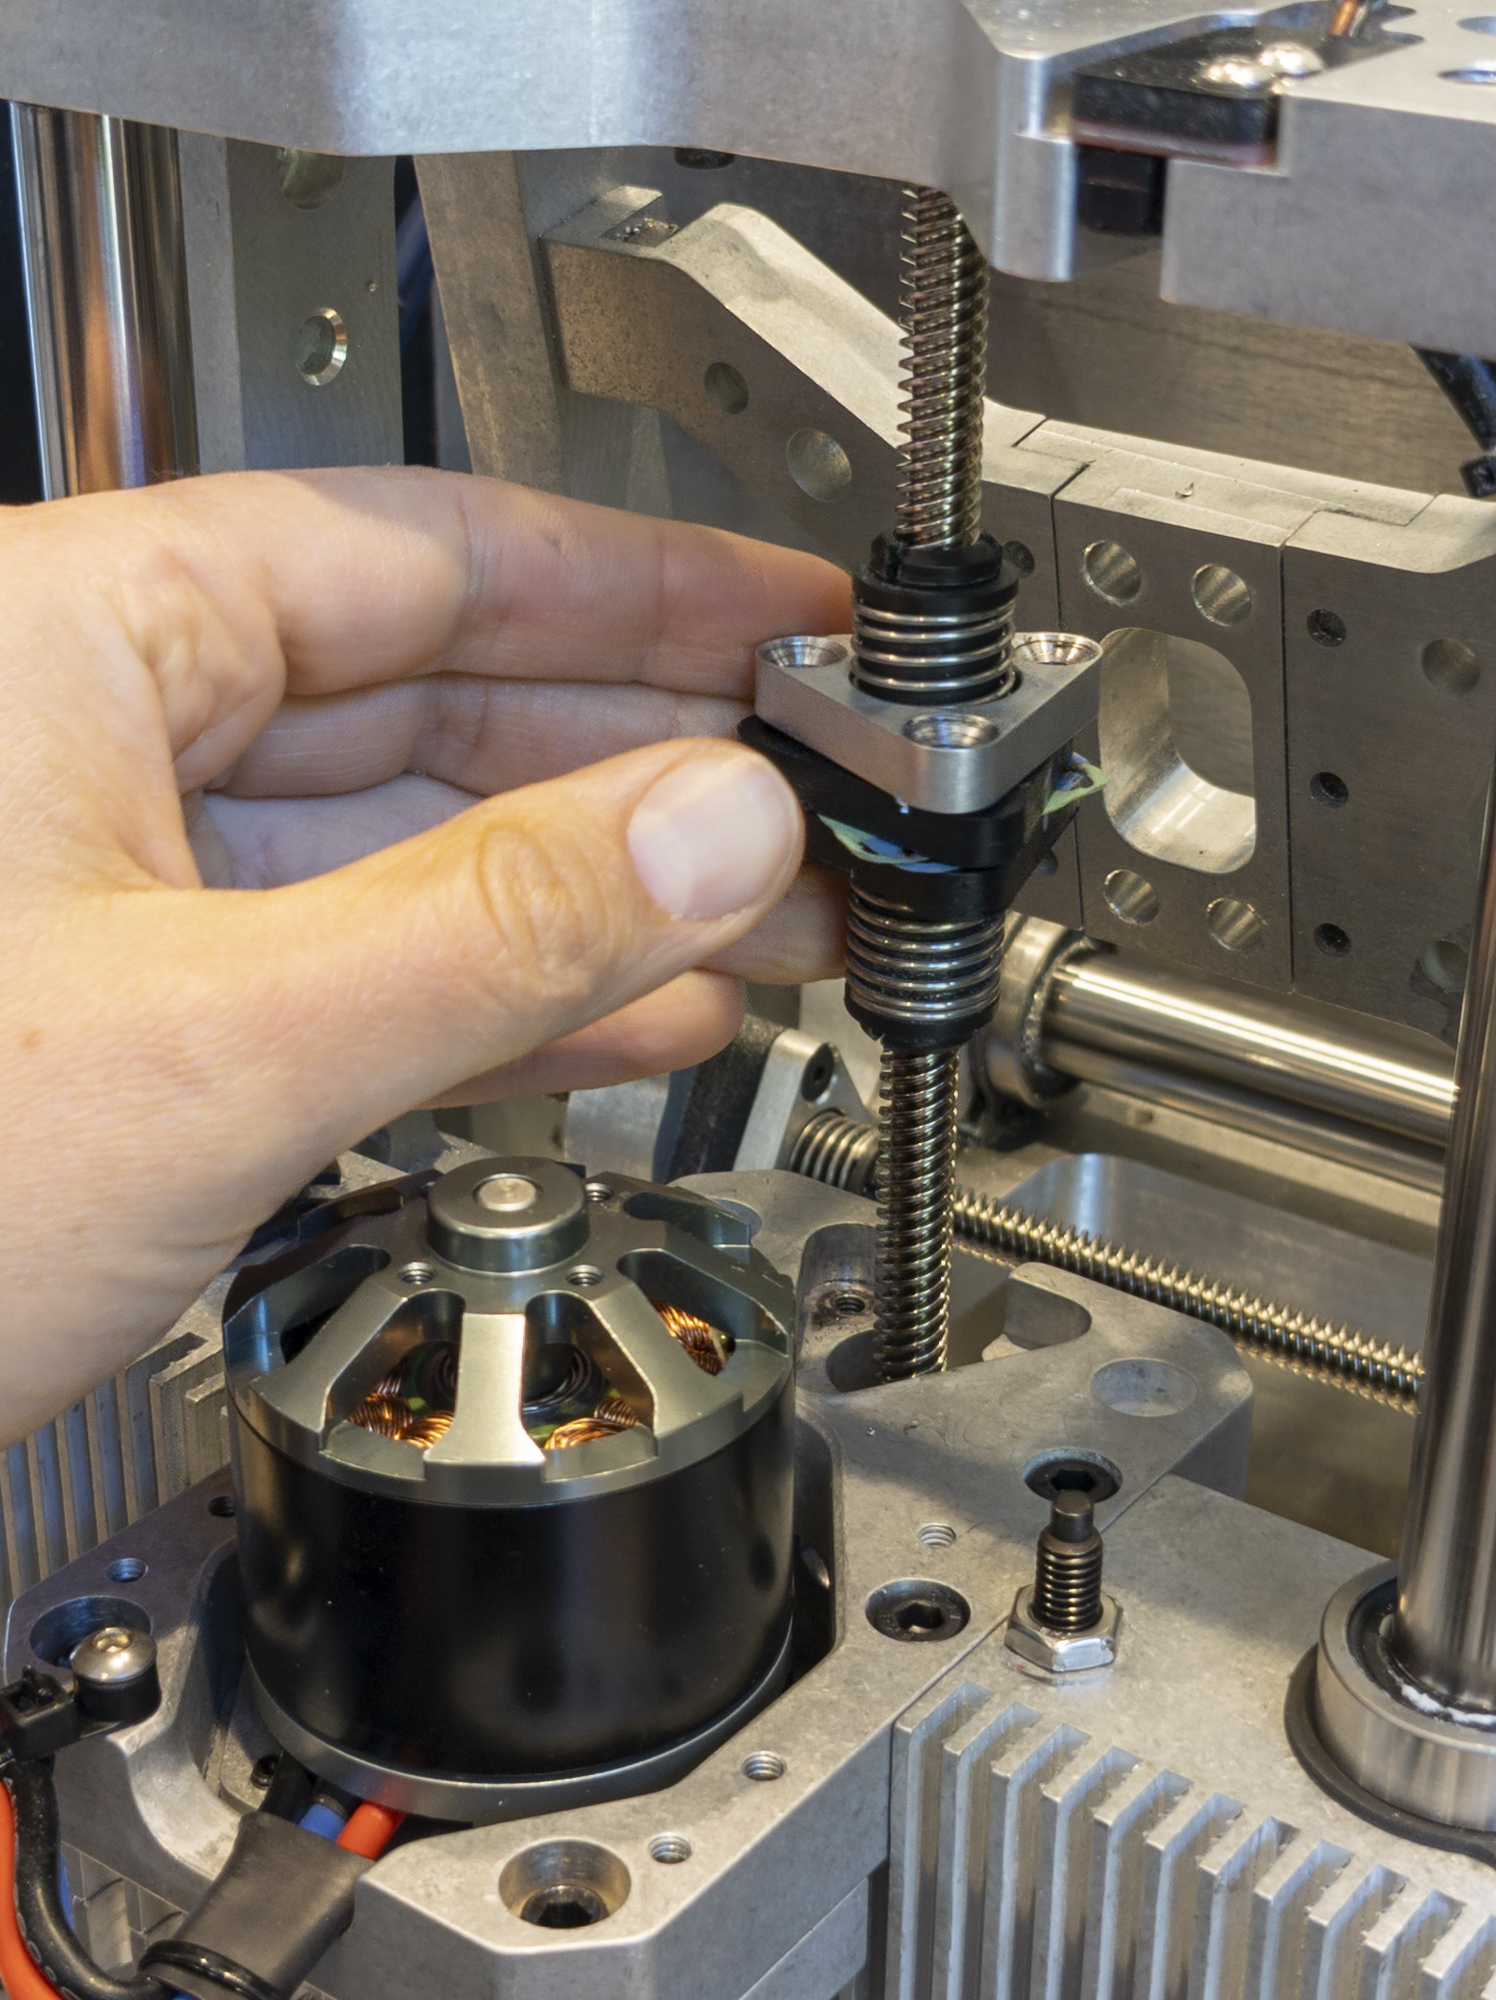
Place the new Bantam Tools Desktop CNC Spindle House Assembly into the Bantam Tools Desktop CNC Milling Machine. Tilt the assembly slightly so that the spindle shaft is pointing toward you. This will help you to carefully maneuver the assembly into the machine without damaging the Z-motor lead screw (what the ABN nut is attached to).

To install the new spindle, we’re going to complete each step outlined above, but in reverse.
First, lower the XZ-carriage rods through the new spindle house assembly, to the lower plate. Then use the rod inserter tool and the ratchet wrench to re-install the rods. Push the rods in from the top of the XZ-carriage, and push them down until they’re flush with the carriage’s bottom plate. If you push the rods so that they’re poking out of the bottom plate, this will subtract from your 3.5” Z-height, and you’ll run the risk of parts of the mill colliding with your stock.
Next, use the torque wrench with the 3/16” square drive to tighten each of the NPT plugs. Keep tightening until you feel and hear a distinct click.
Step 10: Install the ABN nut.
For this step, prop up the spindle house assembly using the rod ejector tool. Screw the ABN nut back down to the spindle house with your hands. Then, one at a time, apply threadlocker to the ABN nut screws and insert them into the nut. Use the 2.5 mm T-handle ball-end hex key to tighten the three screws until they’re snug. Alternate tightening the screws. Finally, use the 2.5 mm square-nose hex key to lock them in place. Be careful not to over tighten and strip the screw.
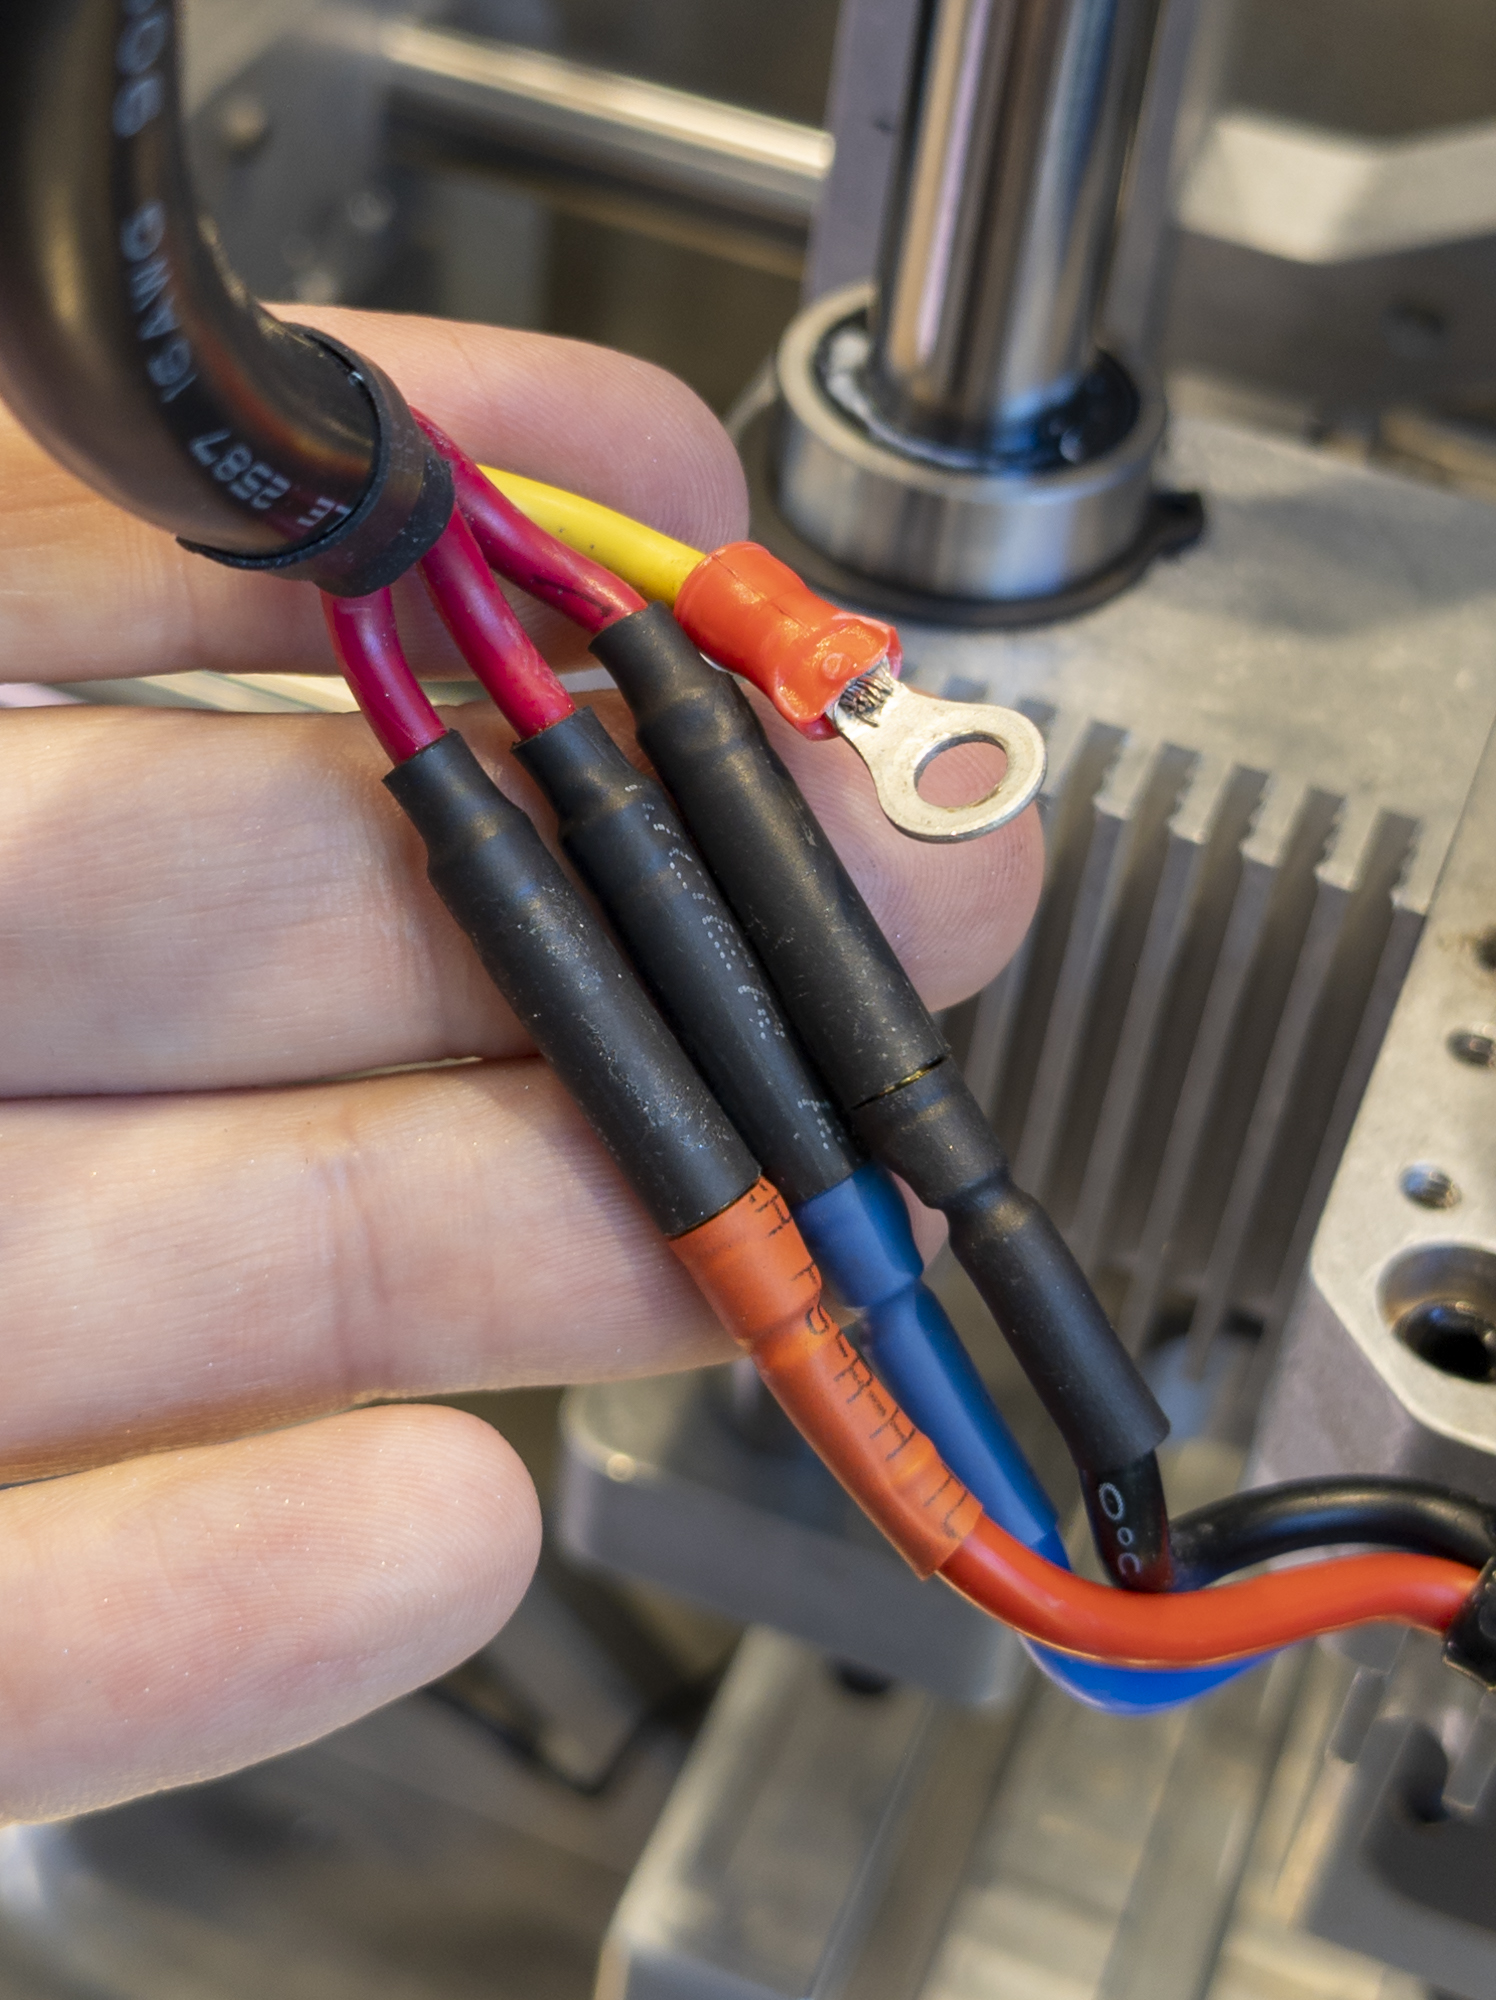
Step 11: Reconnect all wires.
Connect the red, blue, and black wires into the ground wires. The wiring should look like the image below when you’re finished, but don’t screw down the ground plug yet.
Reconnect the X- and Z-axis motor plugs. Once all the wires are reconnected, DO NOT manually move the carriages around. Remember, doing so will result in damage to the electronics in the Bantam Tools Desktop CNC Milling Machine.
Step 12: Reinstall the enclosure’s top panel.
Reinstall the top panel using the 2.5 mm ball-end hex key. Insert and tighten the screws starting in the front, and work your way to the back. Then reinstall and plug in the LED light.
Step 13: Test the new spindle house assembly.
Plug in the machine and disengage the E-stop button. Connect the Bantam Tools Desktop CNC Milling Machine to your computer and launch the Bantam Tools Milling Machine Software (if you don’t already have it open). Home the machine as instructed.
Next, go to Settings and select Launch Debug Console. Run the test code below to ensure the correct rotation of the spindle. Type the following code into the Debug Console:
M3S10000
G4 P3
M5
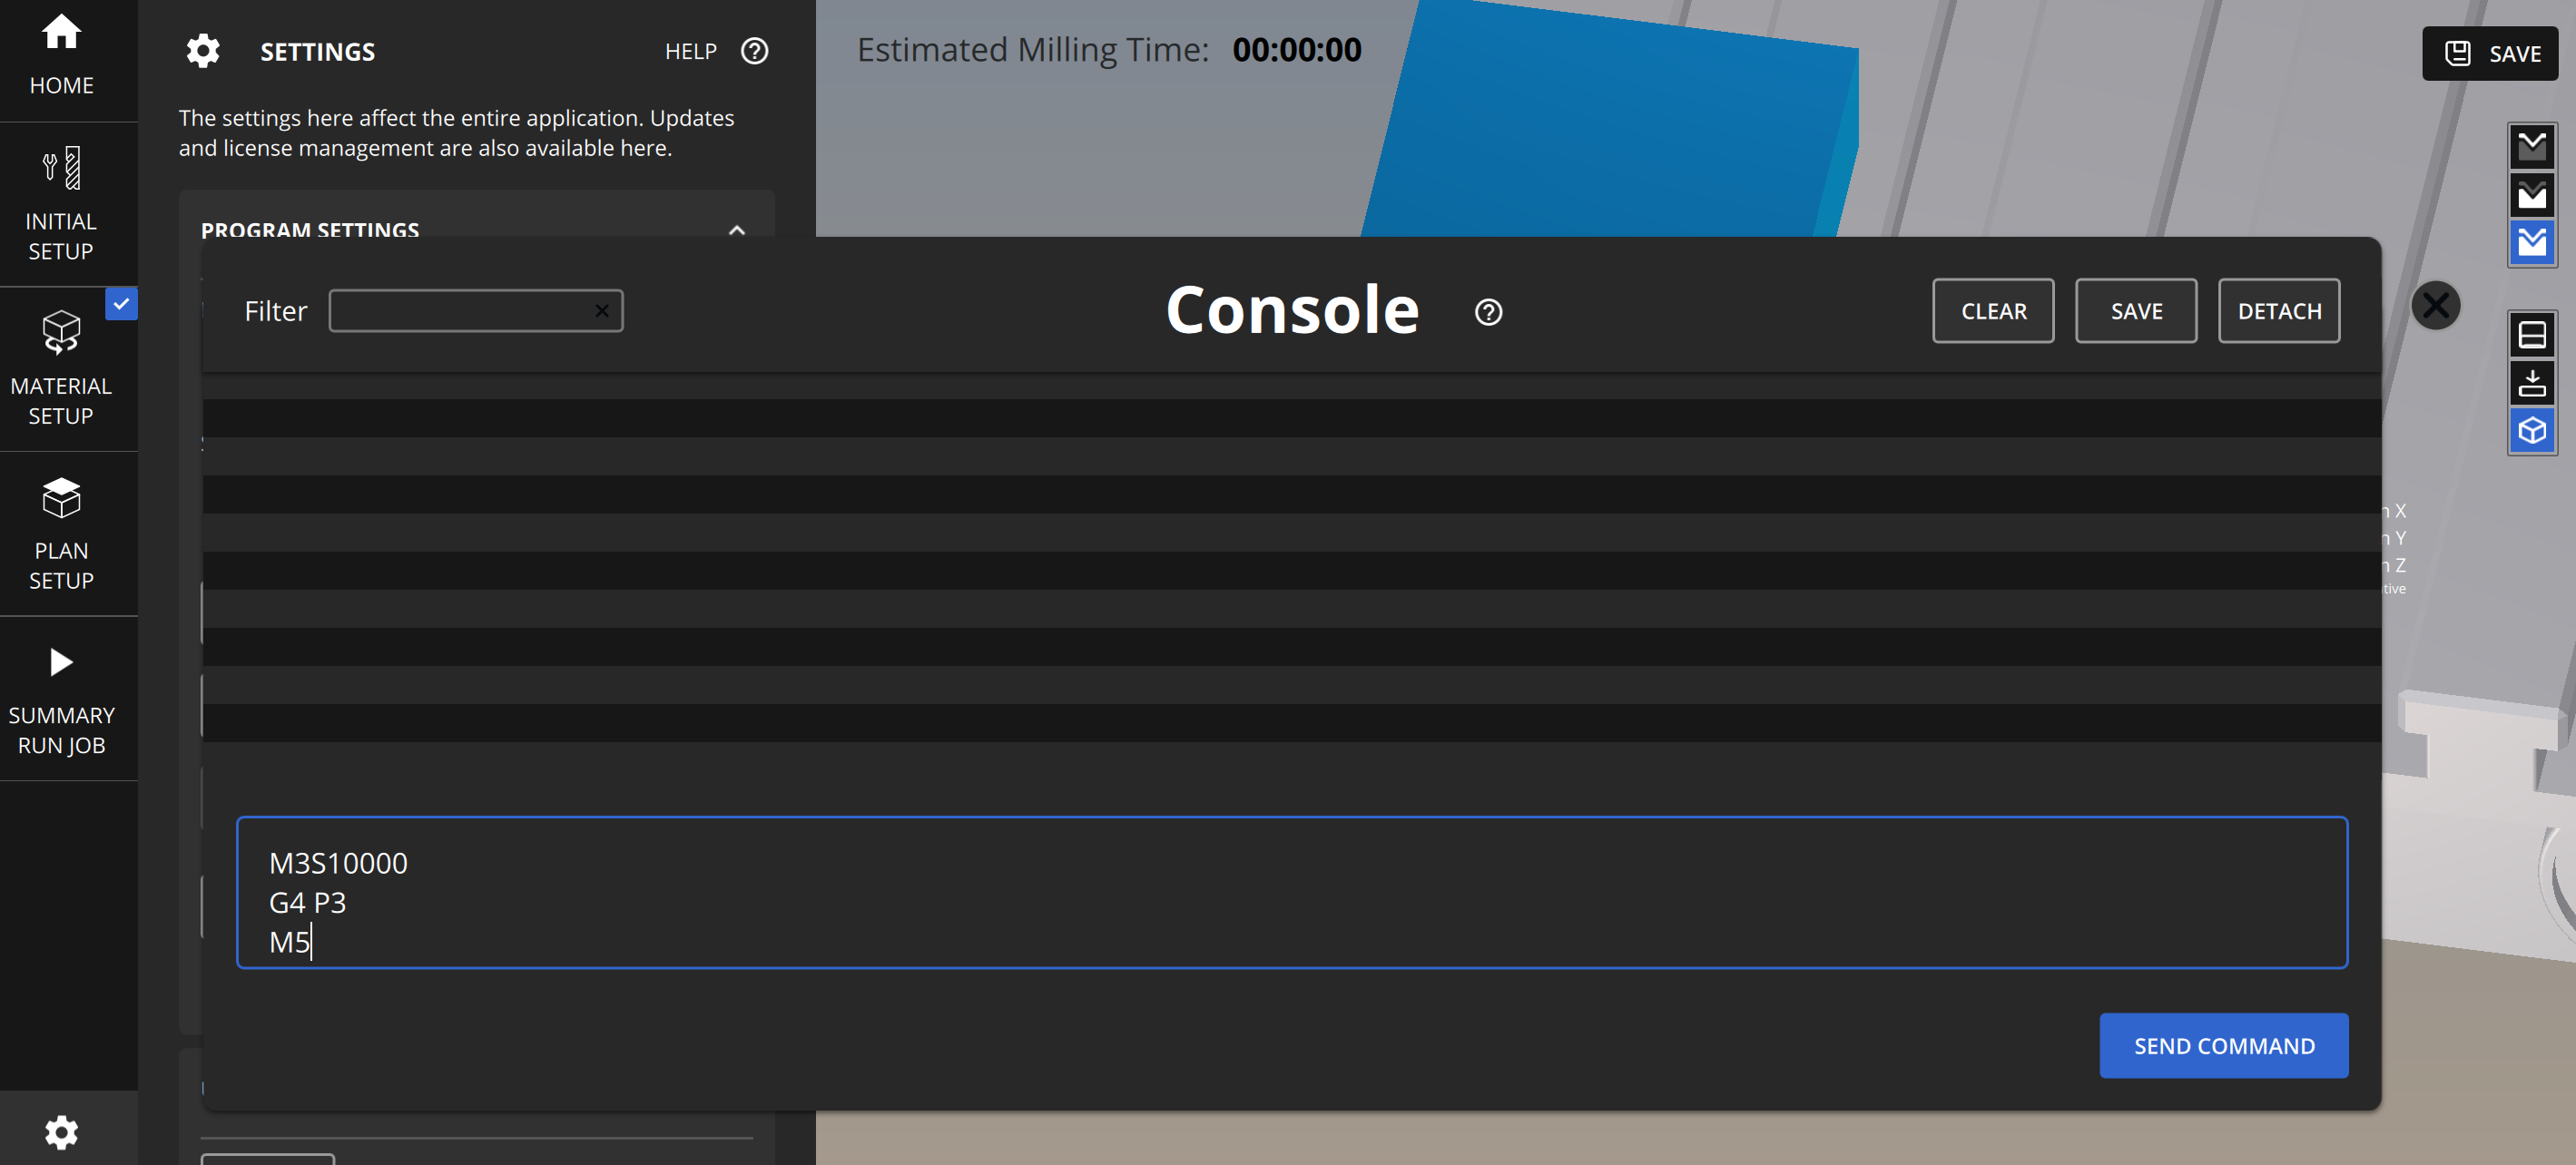
This code will run for about three seconds and then stop, so you can see the operation.
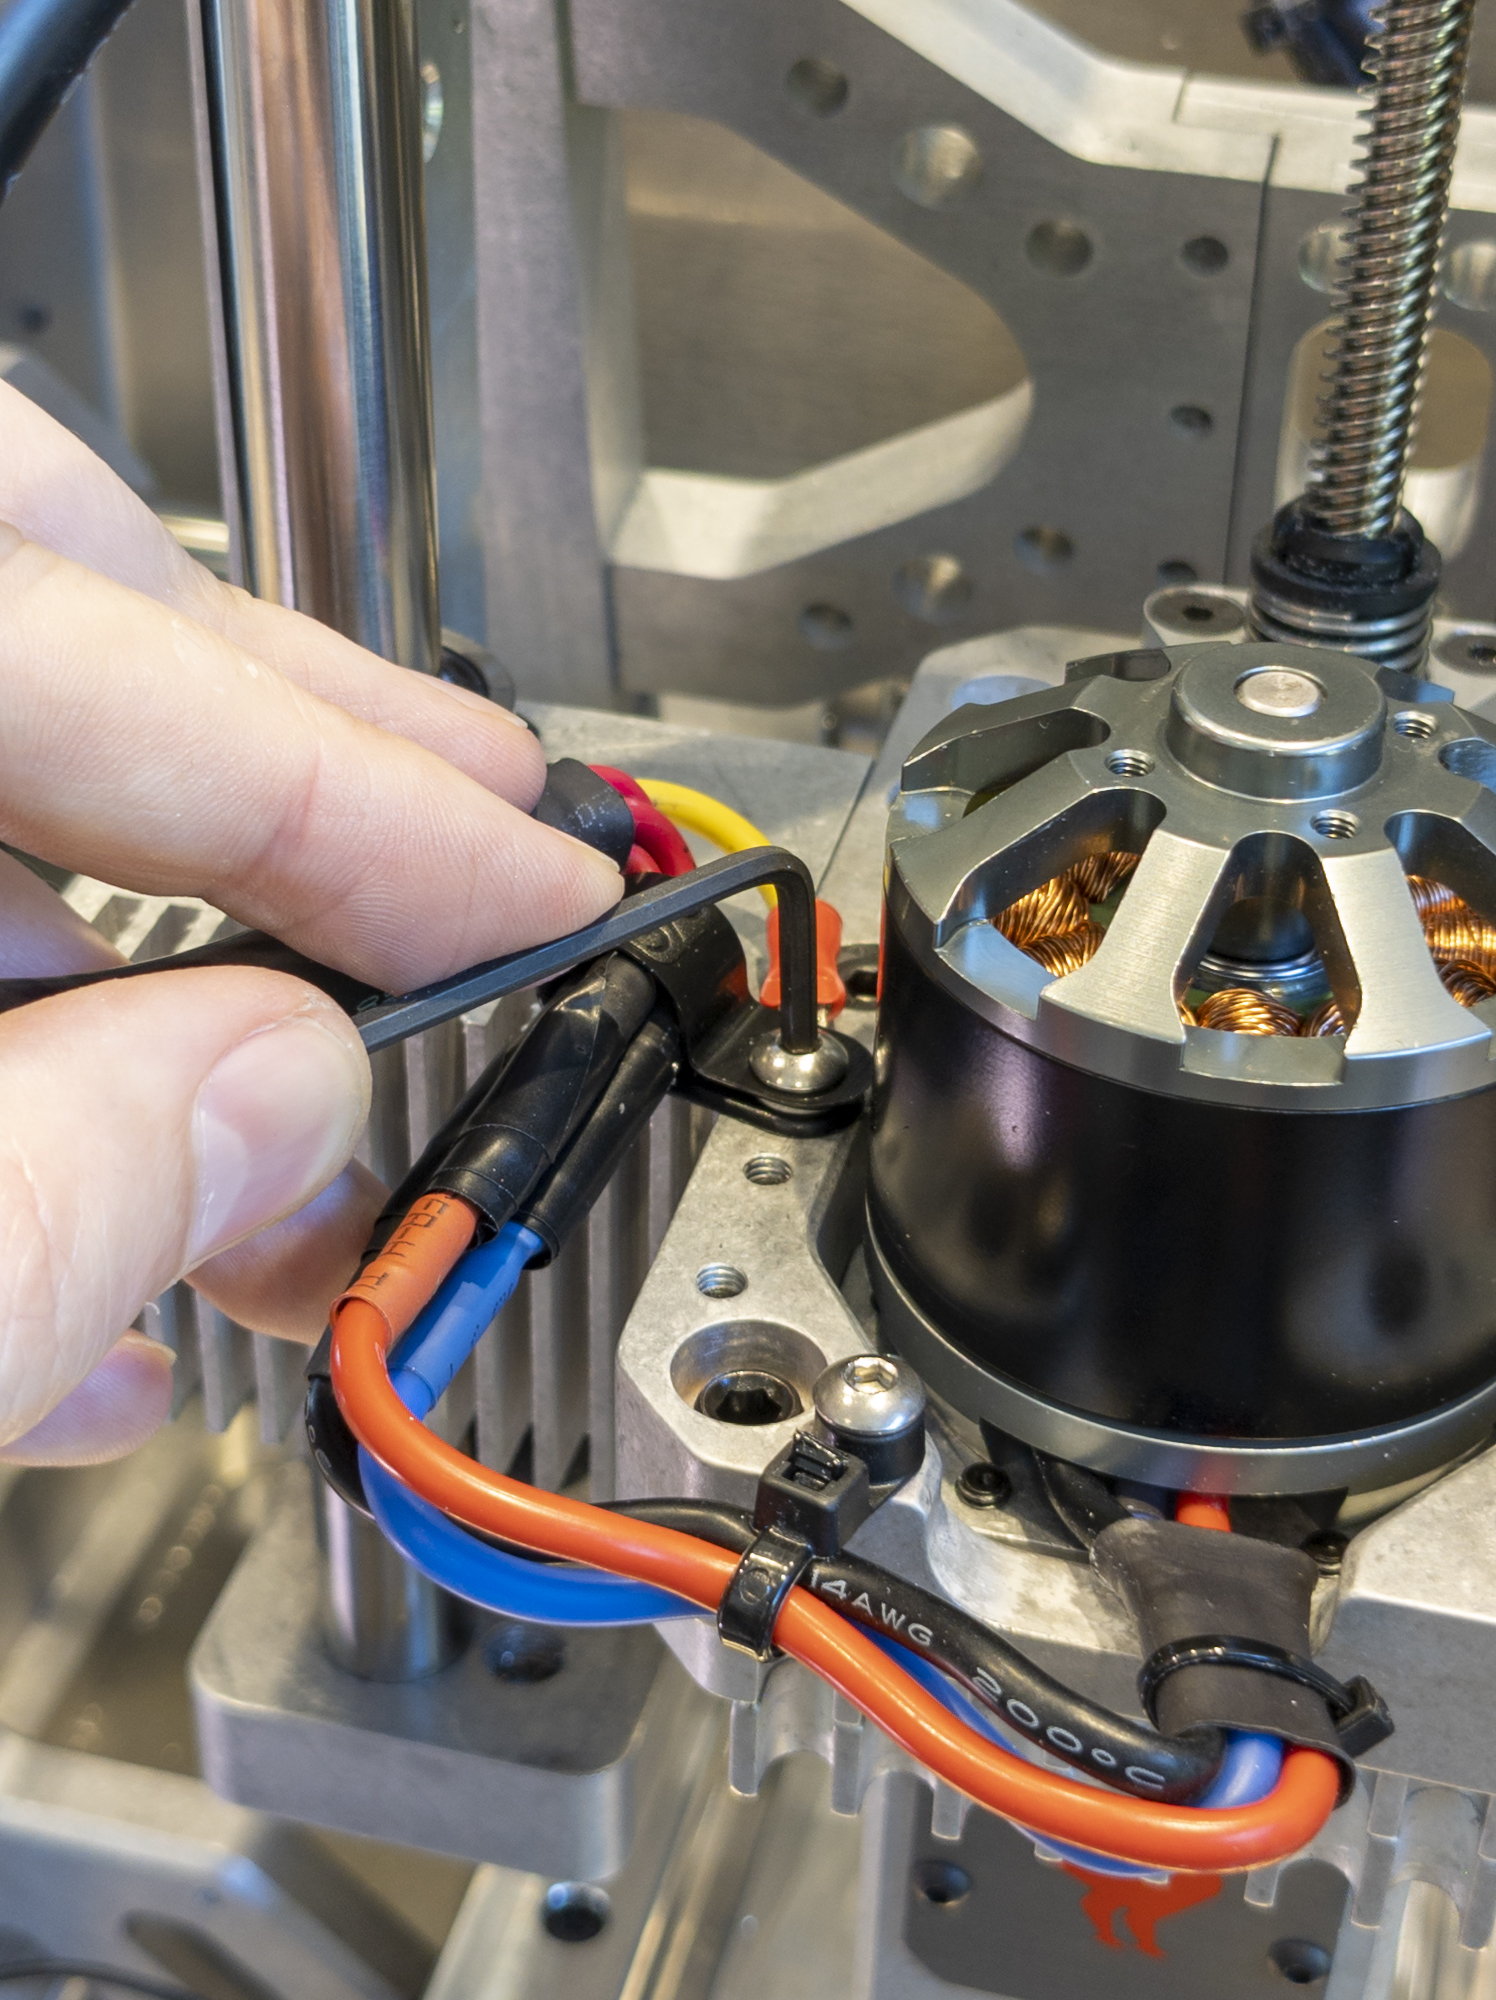
The spindle should be rotating from right to left as you look at it. If the spindle is running from left to right, make sure to turn off the Bantam Tools Desktop CNC Milling Machine, and switch the red and blue wires with each other.
After the code runs and you know the spindle is turning in the correct direction, wrap each connection with electrical tape, to protect against abrasion. If the wires abrade through, the spindle could short out and not turn on.
Finally, put the strain relief clamp back around the ground plug, and use the 2.5 mm square-nose hex key to screw it back into place. It should look like the picture below when you’re finished. Screwing the ground plug down prevents the wires from touching the motor and causing abrasions.
Step 14: Send the old spindle house assembly to Bantam Tools HQ.
To recycle your old spindle and receive $75 back on your purchase of the Bantam Tools Desktop CNC Spindle House Assembly Replacement Kit, pack up the old spindle house and send it back to Bantam Tools HQ. Pack it in the separate, smaller box inside the larger box we sent the replacement kit in. Make sure to put the rubber caps on over the bushing bearings and secure them in place with the rubber bands. The return label is already attached for your convenience. The tools you used to replace your spindle house assembly are yours to keep.
Step 15: Start milling!
Phew, we know this was a long installation, but you did it. Way to go! You’re now ready to get back to machining parts using the Bantam Tools Desktop CNC Milling Machine. If you have any further questions, please don’t hesitate to reach out to support@bantamtools.com.
Mill on!